Fort Saulsbury, DE

Delaware's Forgotten Fort
After WWII, Fort Saulsbury had served its purpose and was no longer needed by the Army. Because of war technology making rapid advancements, the WWI fort was also considered obsolete. Naval vessels with guns that had a greater range, missiles and aircraft such as bombers and fighter planes were becoming the norm. Fort Saulsbury guns had a comparative short range and the gun technology was fifty years old. The guns were removed and demilitarized (cut-up and scraped for the iron). Subsequently, the fort was declared Army Surplus and sold at auction to the highest bidder in March of 1948.
The Kendzierski family was the high bidder at $12,700 and the military fort entered into private ownership. The Kendzierski family operated a salvage company and some of the metal in the fort was sold for scrap. The bunkers became a collection and storage area for scrap metals and items to be sold. At one point during a visit to the fort as a youngster, I recall seeing huge bales of used cardboard being stored in the bunkers.
(Under construction)
This page will cover the life of the fort after the wars to present day.
(As a reminder, the fort is privately owned and visitation and inquiries are not recommended.)
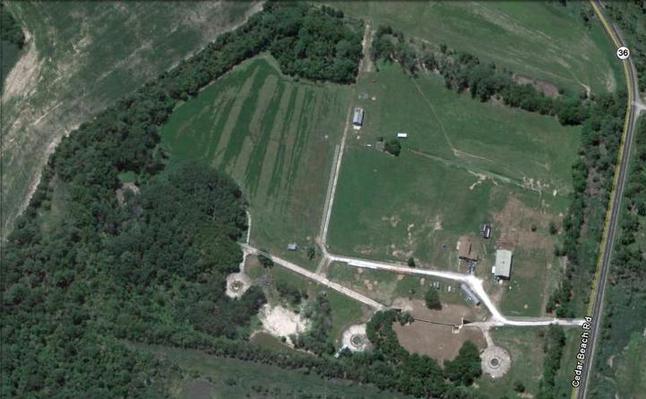
A 2010 aerial view of the fort. Notice how the trees have grown over the past 70 years which have almost totally obscured Battery Haslet on the left.

For a period of time, the Liebowitz Pickle Company (known to locals as the Milford Pickle Plant that was located on N.E Front Street Ext.) rented the bunker areas for pickle storage. Following one of my public presentations on the fort, an individual came forward and gave me a product label. He stated that the label was for one of the products associated with the fort. A picture of the label is included on the right. During the late 1950's, through the 1960's and for most of the 1970's, the fort was used to provide cooler storage for more than 25,000 wood barrels of pickles, pickled tomatoes and other pickled products. Each barrel held 50 gallons of product. (a total of more than 1.25 million gallons of product) Milford Packing Company, Inc. closed January 4, 1974.
In 1982, the fort property was sold by the Kendzierski family to the family that presently owns the historic parcel. It is still privately owned property and is currently a working farm. It operates as Cedar Creek Farm, which primarily raises livestock. The fort continues its aging process and shows the wear and tear from the almost 100 years since it was constructed. The first 30 years were spent in serving our country in two World Wars and now for almost 70 years the fort has been privately owned.
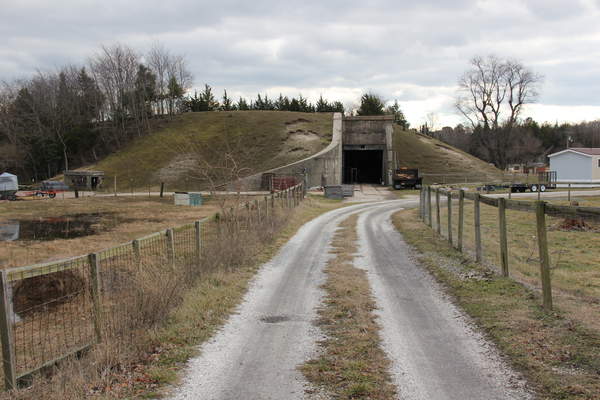
A local newspaper recently had a story entitled "Goats replace Soldiers and Prisoners at Fort Saulsbury." THE CAPE GAZETTE ran the article with a photo of the entrance to the farm taken by Dennis Forney. The picture clearly shows the Battery Hall bunker and its North entrance.
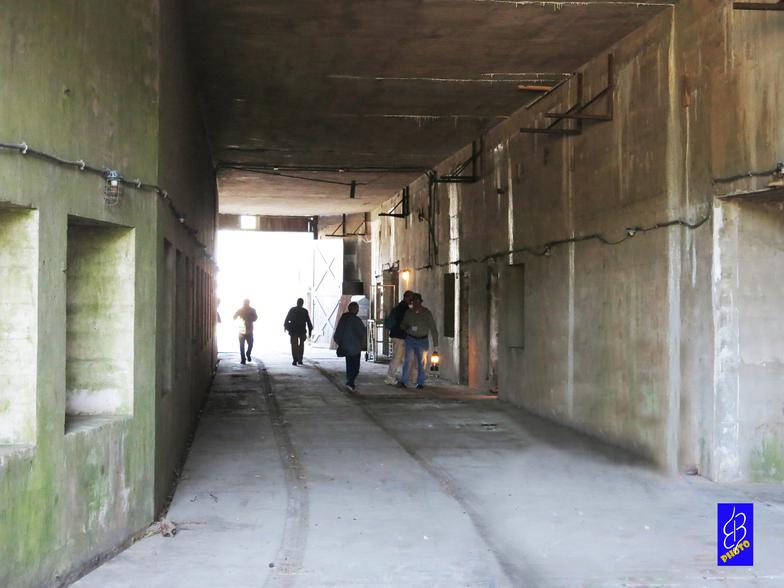
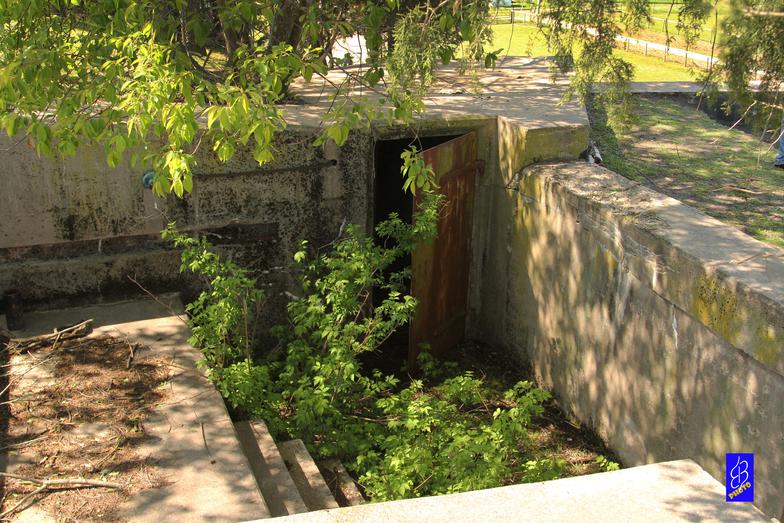
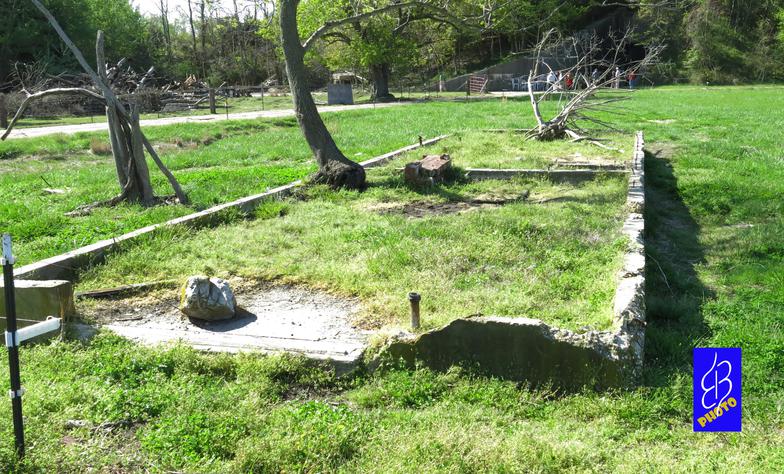
This is the foundation that remains from the Officer's quarters. Some of the anchor bolts are still visible especially along the right side. In the background, where the people are standing, is the North entrance to Battery Haslet with the sloping curved wall. The light area in the upper left is the connecting road/railway between the two batteries.
* * * * * * * * * * * * * * * * * * * * * * *
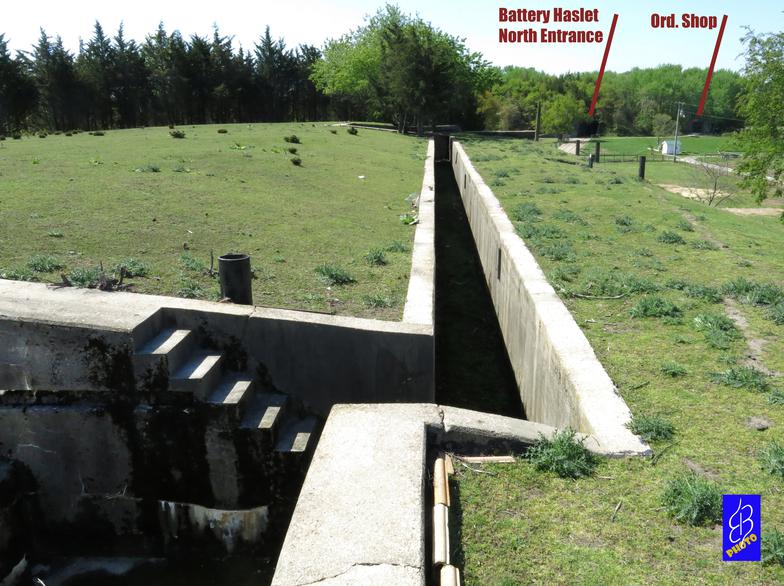
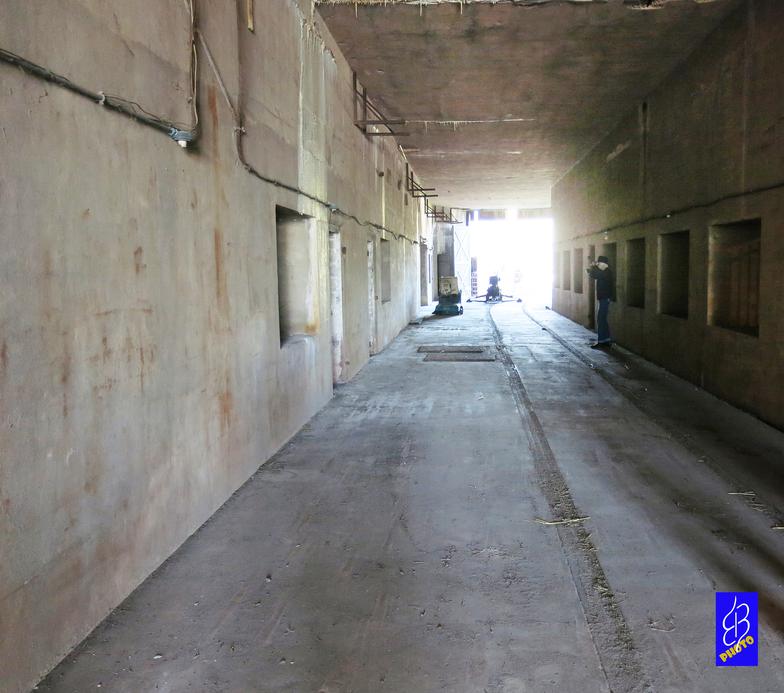
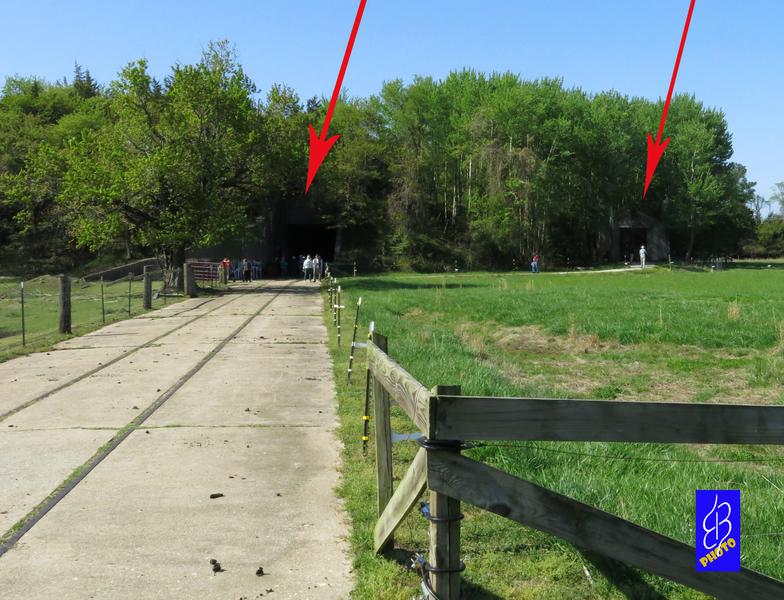
Looking south toward the North entrance of Battery Haslet (left arrow) showing the connecting road/railway between the two batteries. The right arrow is pointed toward the remains of the Ordinance Shop.
FORT SAULSBURY after almost 100 years
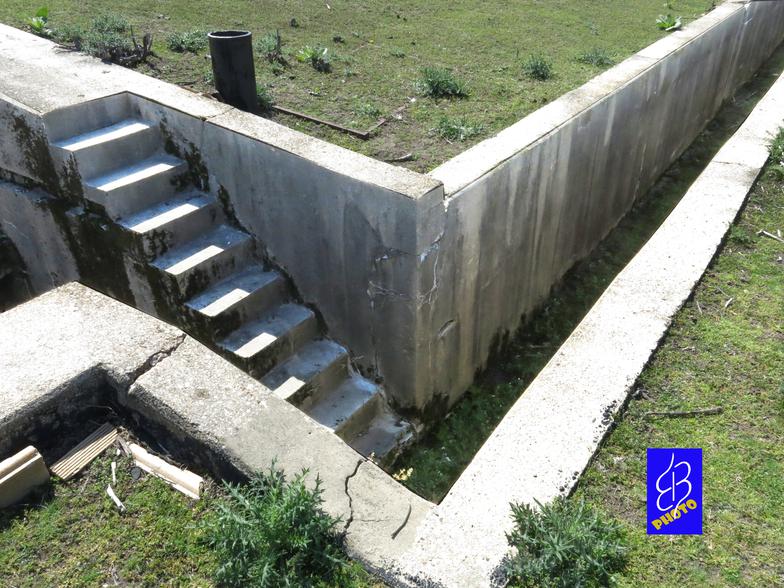
This picture was taken from on top of Battery Hall looking South toward Battery Haslet. It shows the connecting channel from the North BC (Battery Command) location to the South BC location. The pipe behind the steps is the vent pipe from the plotting room directly below.
This area will show the effects of aging on the fort. Another prime objective is to also show the sections of the fort and how they relate in position to other locations of the fort.
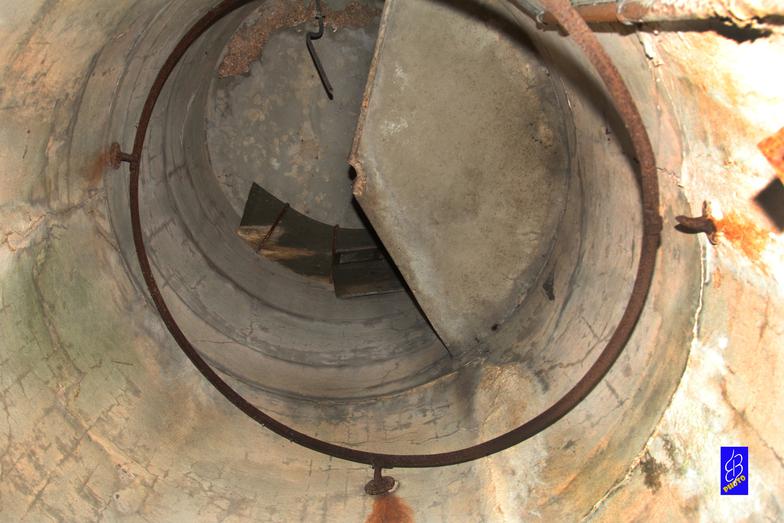
This is a picture of what was once a spiral staircase that provided access to the Battery Command Observation posts. The picture was taken from the ground floor looking up. The exit was through a steel door into the BC post. Each battery had two of these staircases each going to one of the BC posts.
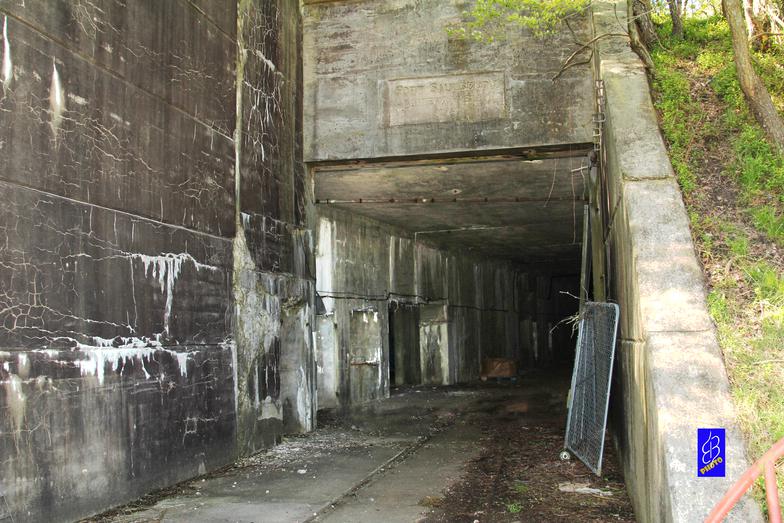
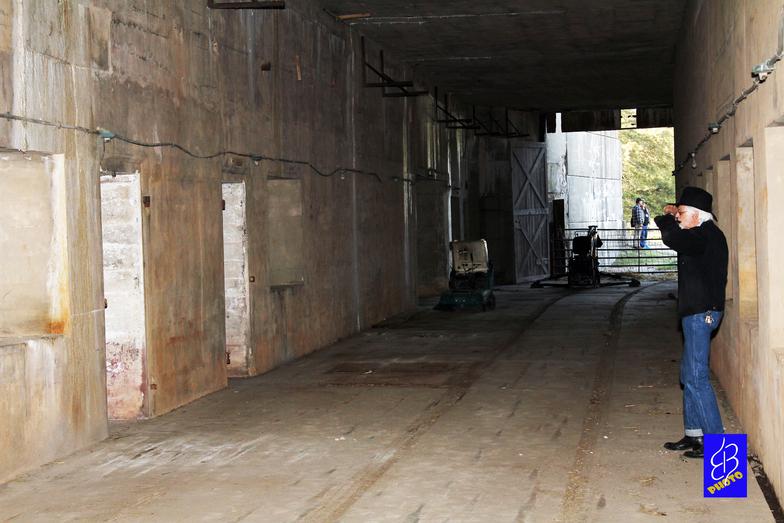
This is a picture of the southern entrance to Battery Haslet looking North. You can see trough the service tunnel but a boat is blocking most of the view. The over growth is quite evident in this picture. Also, the steel rails have been removed from the floor in Battery Haslet.
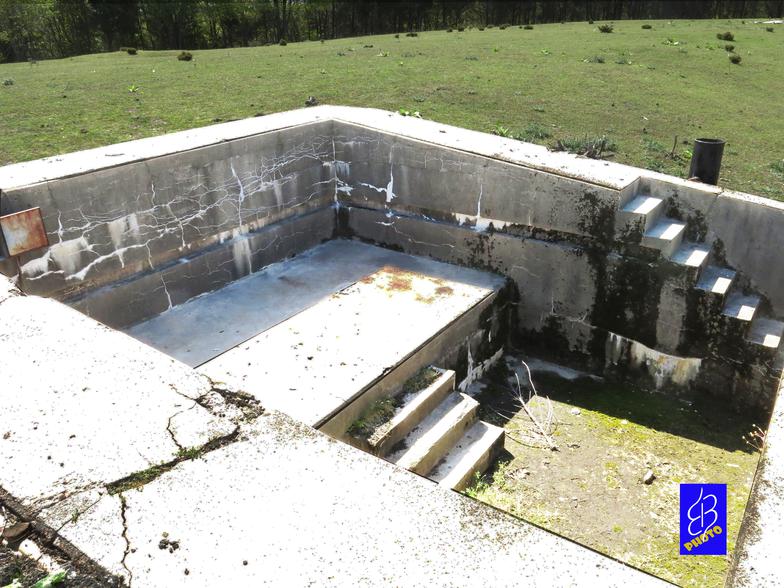
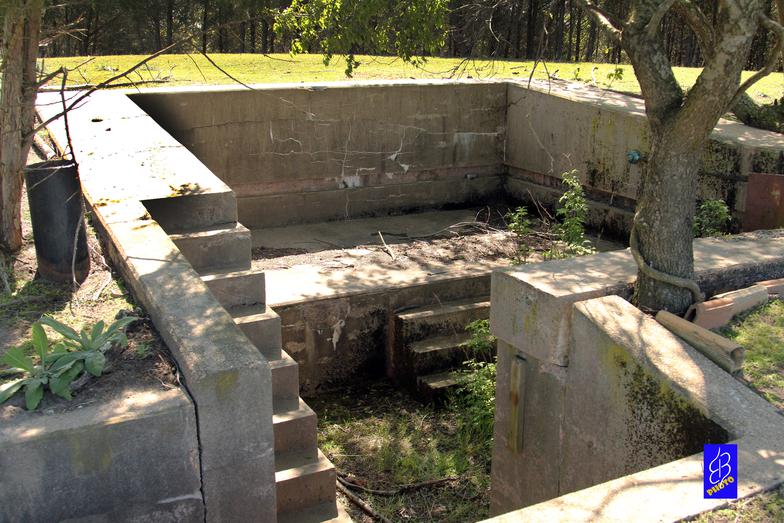
This view is looking down into BC area. It is the southern one of Battery Hall closest to gun pad #1. Sighting devices were placed on the pad at left. The open steel door is the access to the spiral staircase leading to the ground floor. The beginning of the connecting personnel channel is in the lower right. In the upper right is the road/railway connection between the batteries with Battery Haslet being further south at top of picture. .
This view of the connecting personnel channel for Battery Hall is looking North from the BC area in the picture above this one. The lighter colored concrete at the end of the channel is the northern BC area of Battery Hall. The black pipes at left are vent pipes from the troop quarters area below. This view is looking in the opposite direction as shown in the picture above.
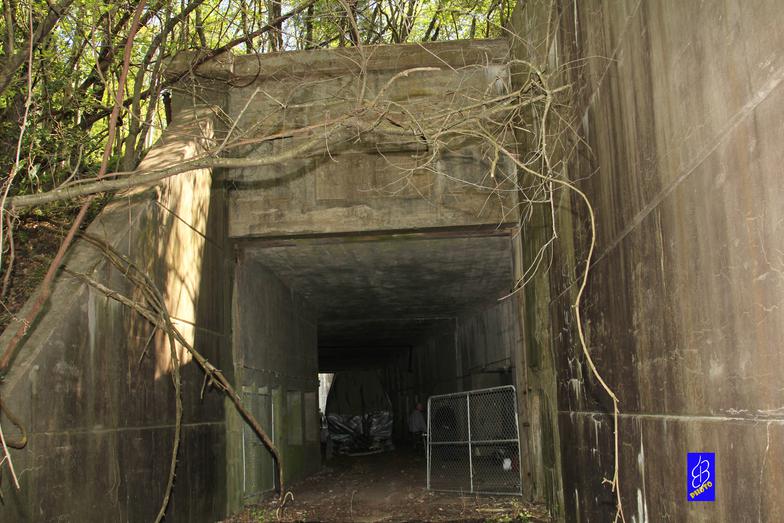
This is the North entrance to Battery Haslet looking South. You can see where the railroad tracks used to be, but the steel has been removed.
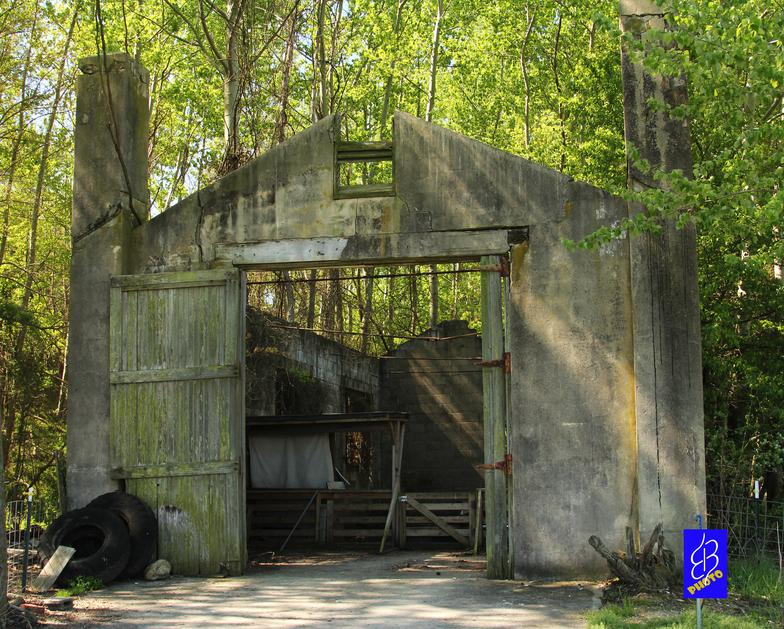
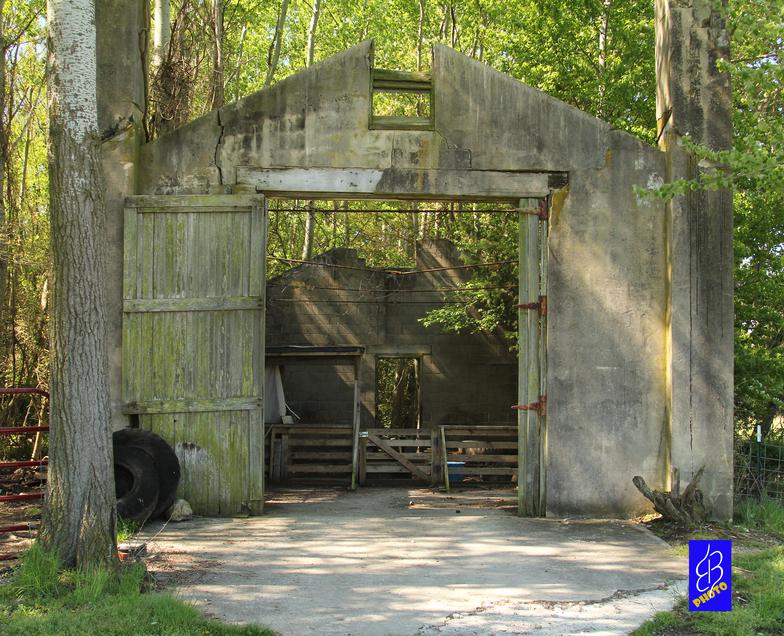
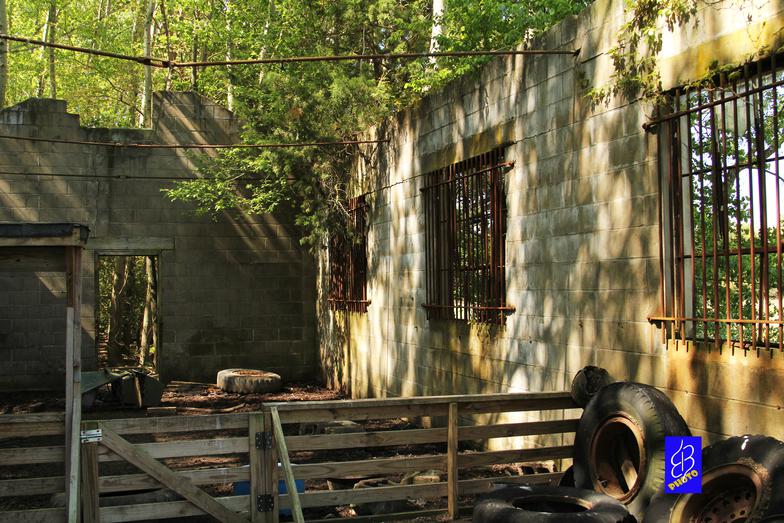
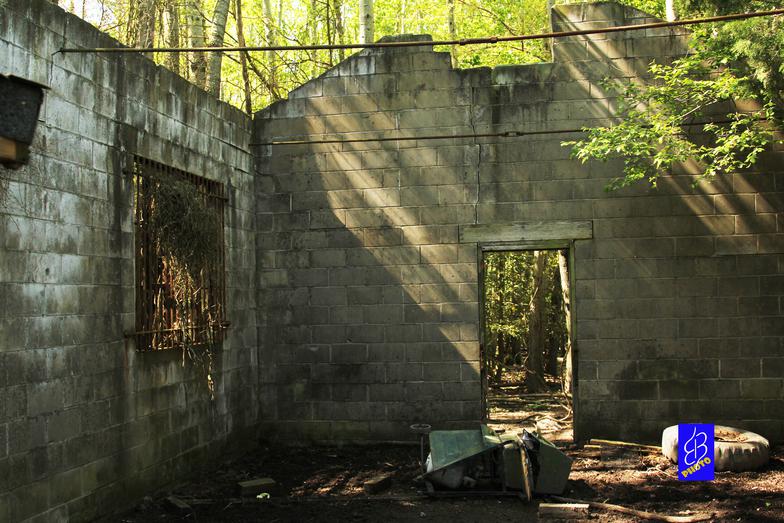
Two pictures of the front of the remains of the Ordinance Shop. The roof is completely gone with most of the block walls still standing.
These two views were taken from the front of the Ordinance Shop looking toward the back of the building.
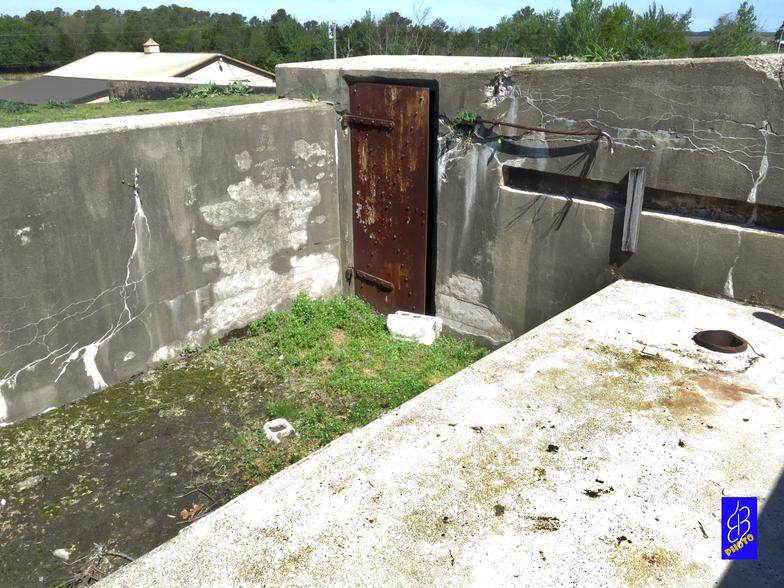
This is the north end BC of Battery Hall looking at door access to spiral staircase leading to ground floor.
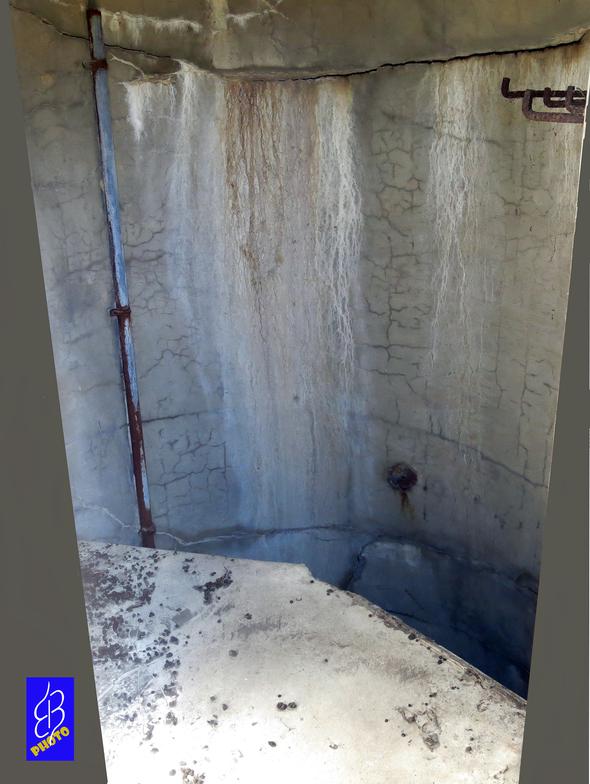
This picture is looking into the spiral staircase with the door in the picture at right opened. The white area at the bottom is a landing where the spiral staircase was attached. The steel steps of the staircase have long since been removed. The underside of this landing can be seen from ground level in picture above.
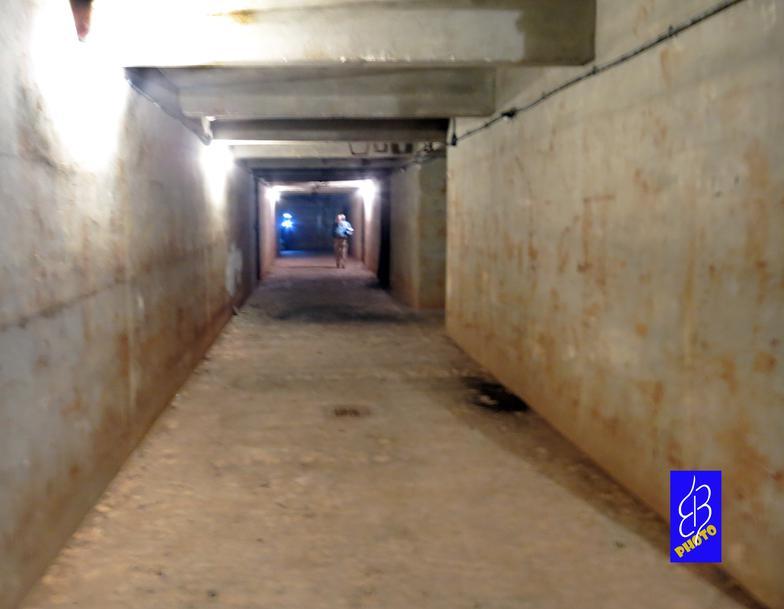
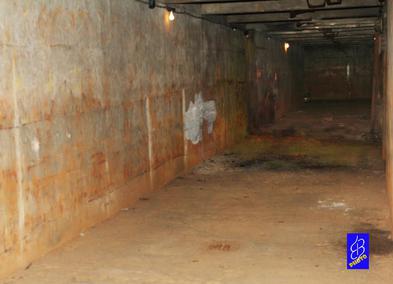
Inside of Battery Hall service tunnel looking south with ammunition bunkers to left and troop quarters to right.
Looking north through Battery Hall service tunnel. Supplies were delivered by narrow gauge railway to the fort.
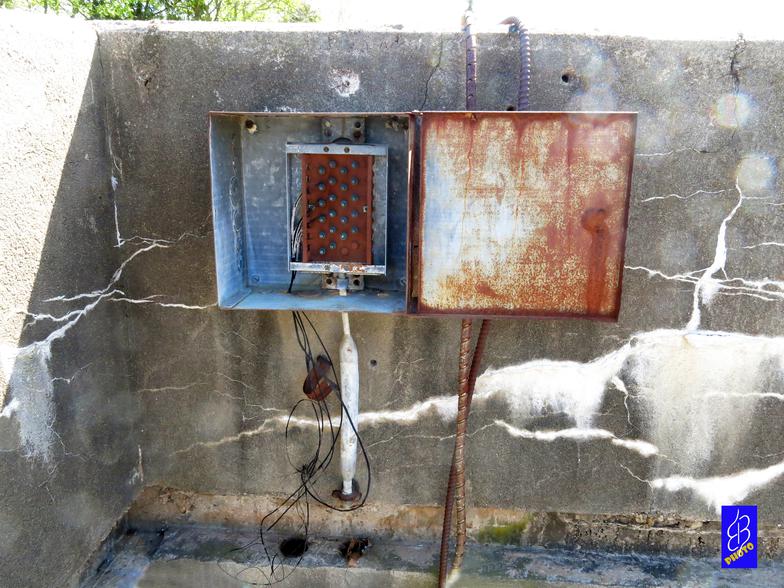
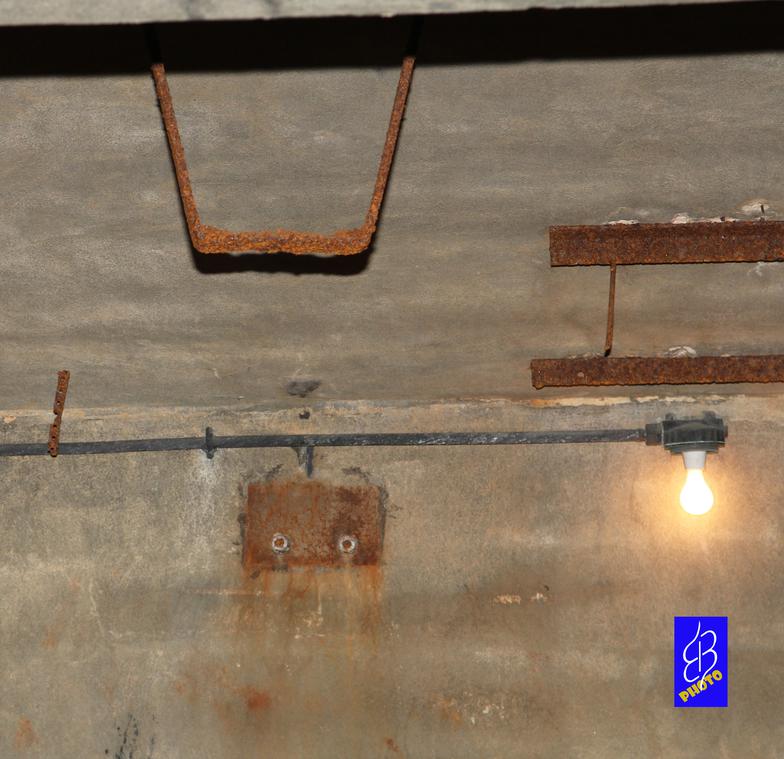
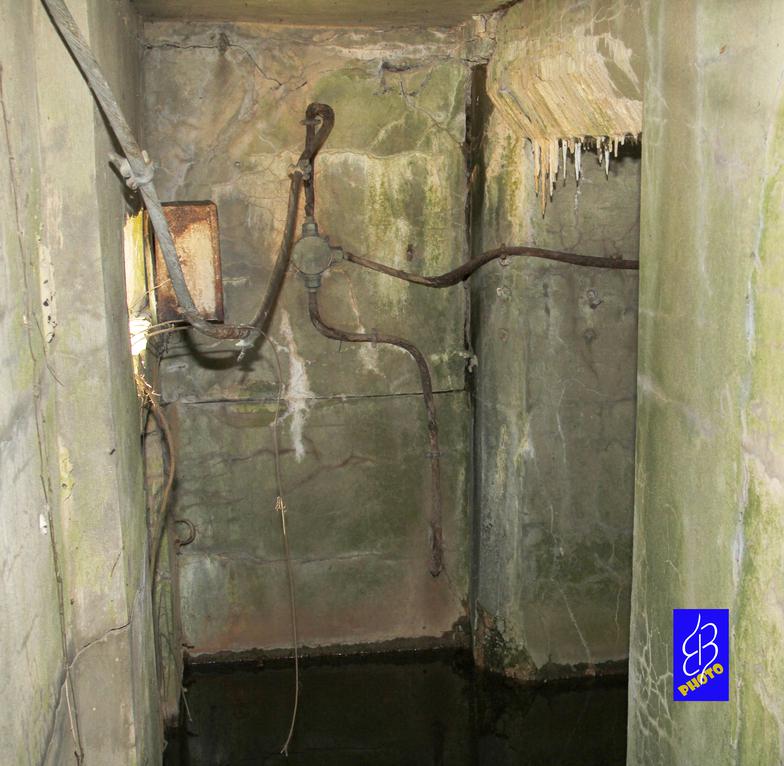
This is a picture of the north BC area showing the communications wiring panel that provided telephone communications to the plotting room from the BC observation post.
This is north BC area for Battery Hall. Platform is for mounting sighting scopes. Box at left was for communication connections. Steps at right lead to connecting channel.
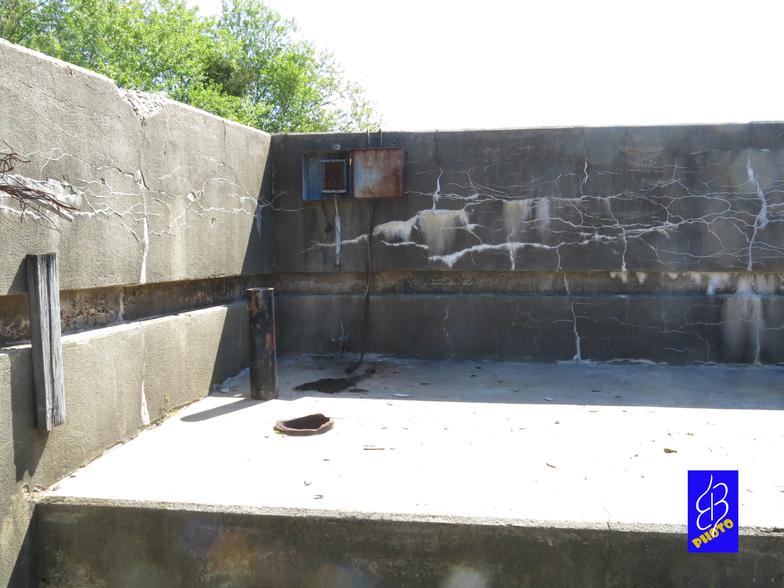
Another view of north BC area showing platform for viewing scopes and communications panel (also shown below).
This transition corner from BC area to personnel channel
Another view of south BC of Battery Hall.
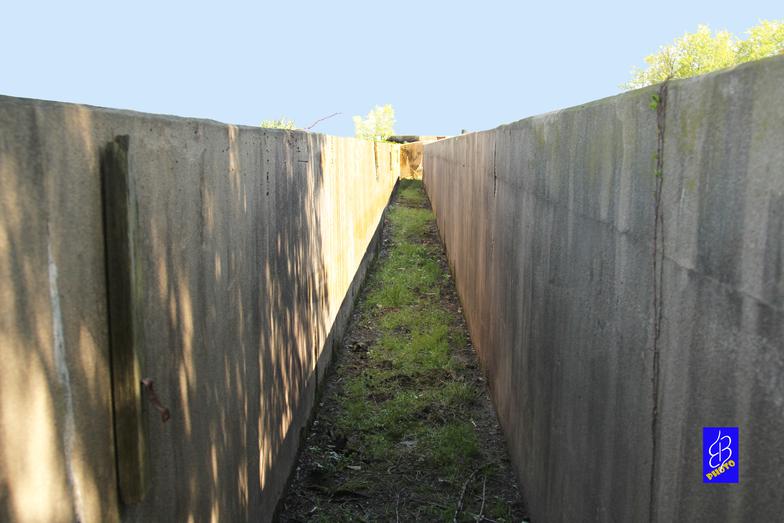
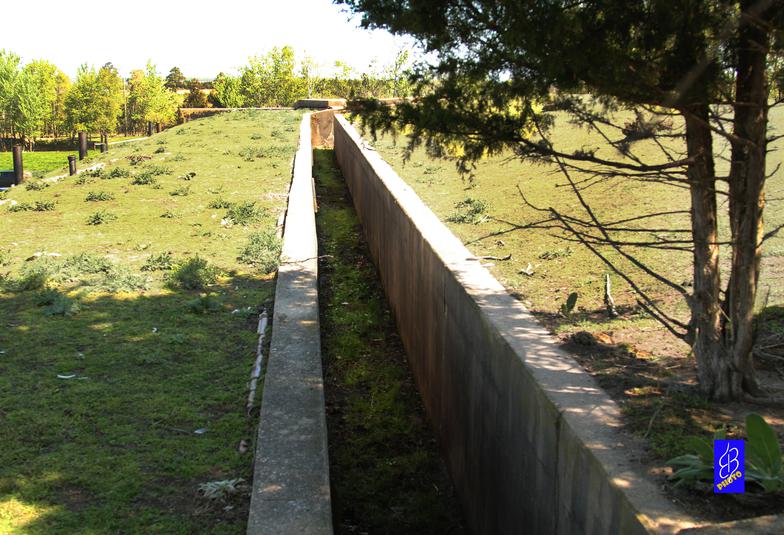
Picture of channel taken at "eye level." It might be interesting to note that the bottom of this channel is approximately the same level as the top of concrete portion of bunker underneath. The depth of the channel roughly equates to the depth of the earthen covering of the bunker. This channel is located over the easterly sidewalls of the main corridor below.
INSIDE THE FORT
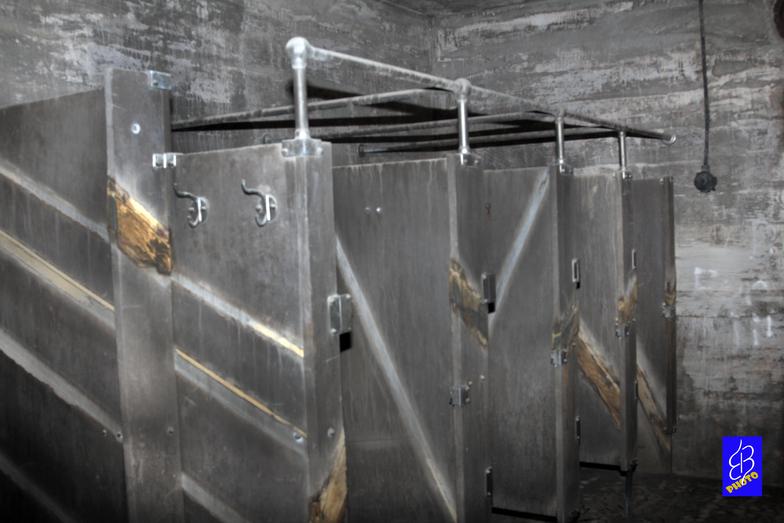
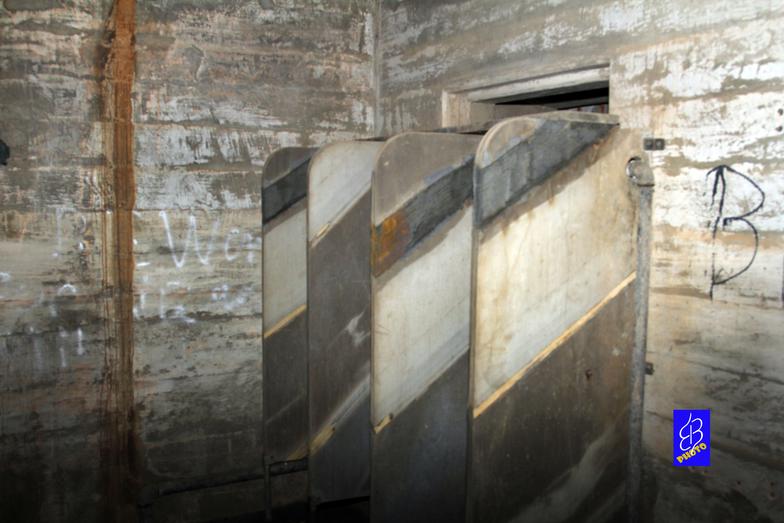
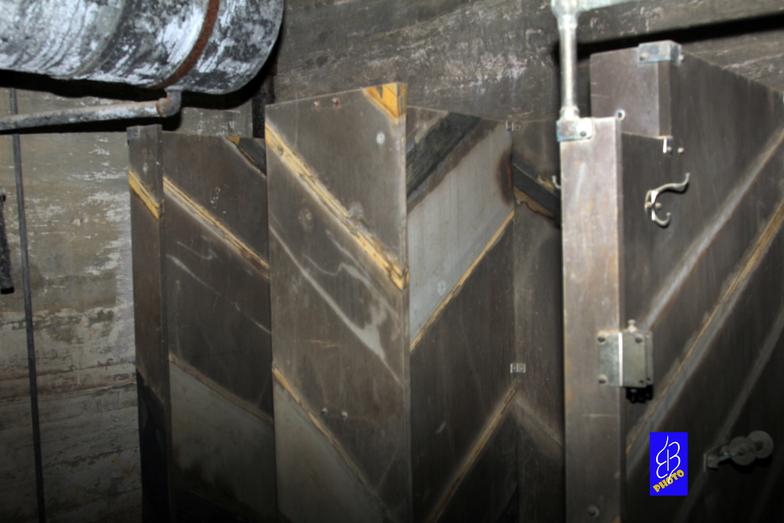
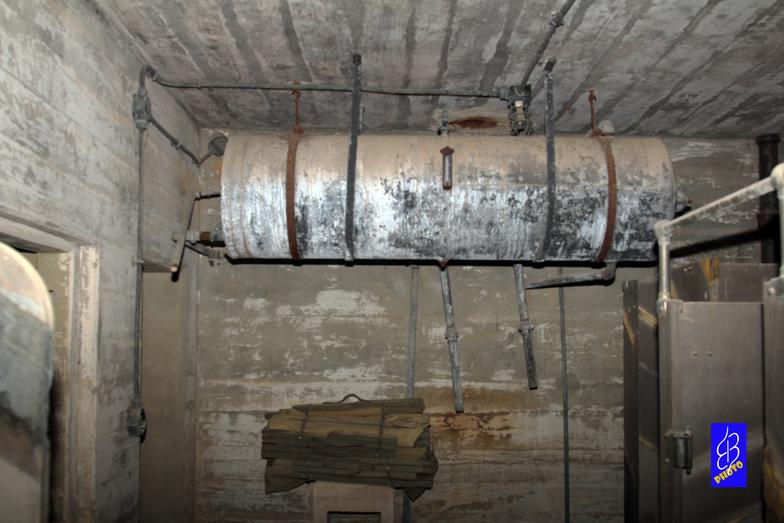
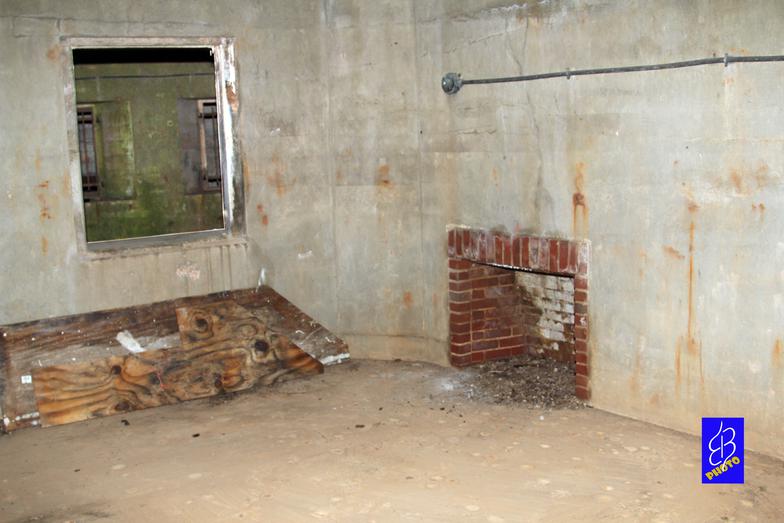
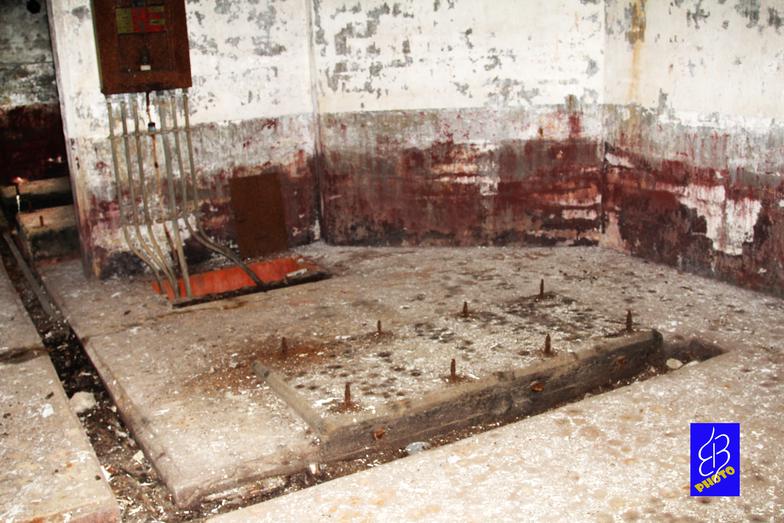
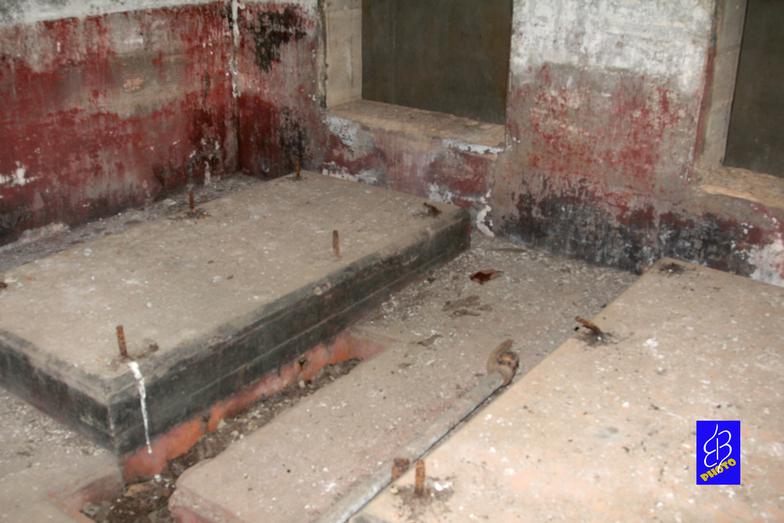
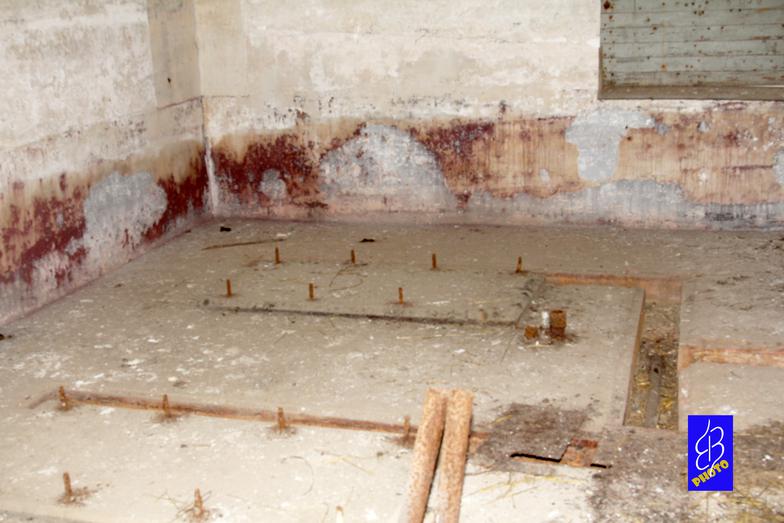
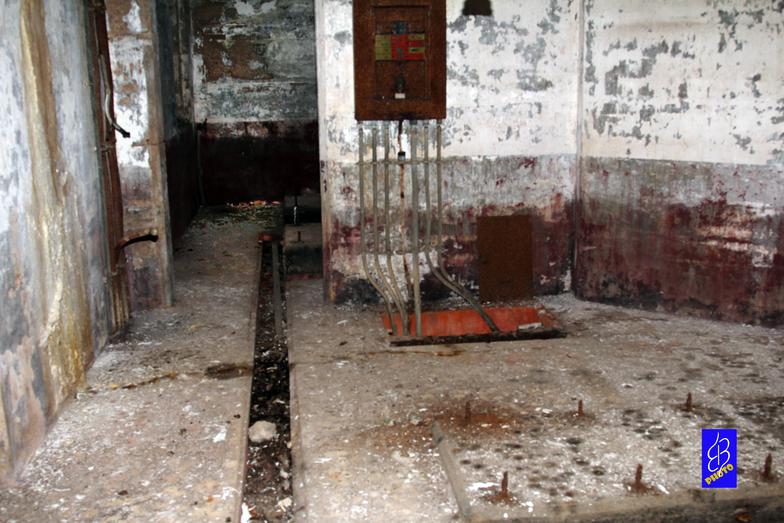
These four pictures show the latrine and shower area for the troop quarters for Battery Hall. Note the overhead water supply tank at lower right.
Battery Haslet had identical facilities. However, the condition of Battery Haslet, in general, is much worse than Battery Hall. The condition of the latrine area in Haslet is such that it would serve no purpose to post pictures. The Battery Hall pictures "tell" a better story.
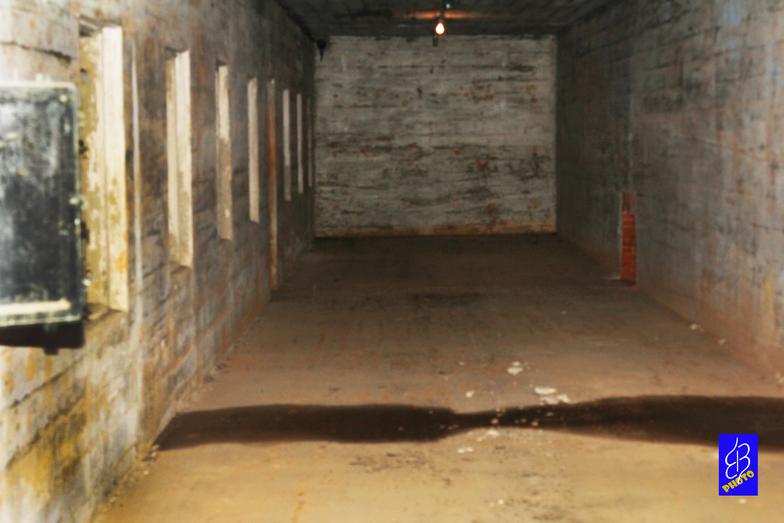
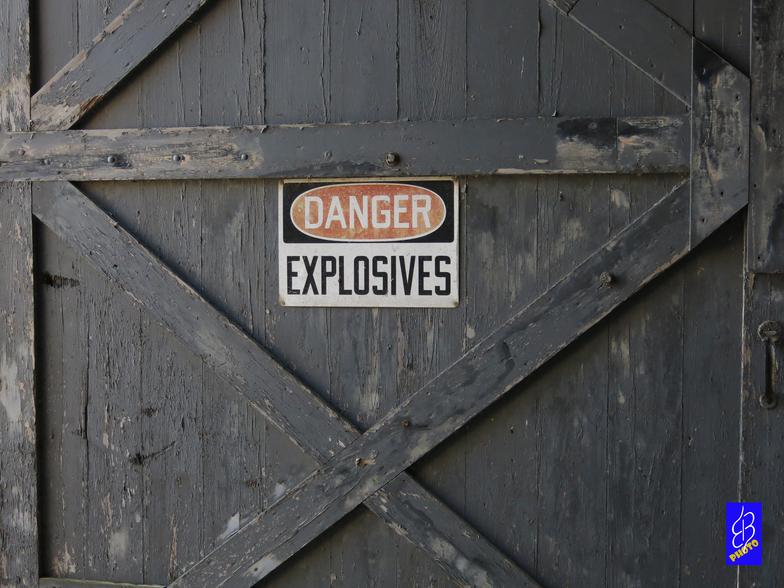
As one enters the north entrance of Battery Hall into the main service tunnel, there is a warning sign posted on the door regarding EXPLOSIVES. Once inside the main tunnel, ammunition storage (powder and shells) is on the left and troop quarters are on the right. The first room on the right is the lavatory facilities. The first room on the left was the plotting room.
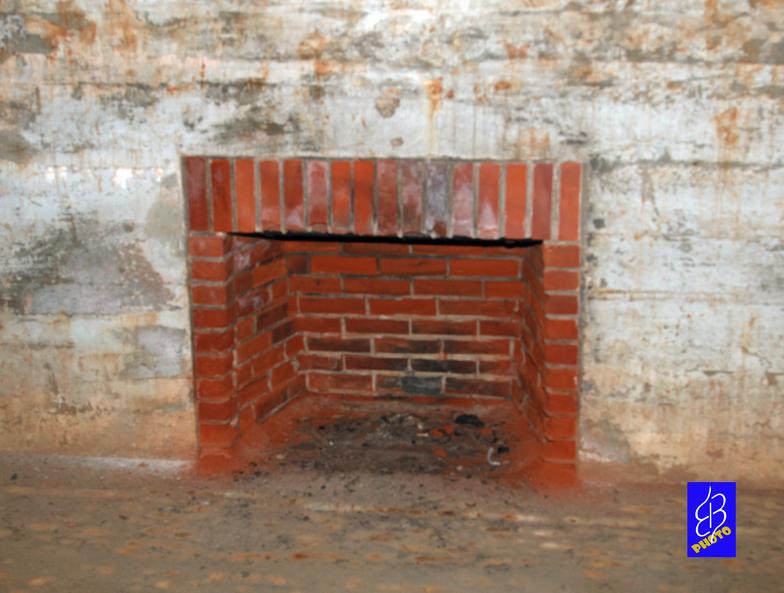
The above picture shows the interior of the troop quarters. The red area along the right wall is the fireplace which is also pictured above. The left wall has "windows" similar to the pictures below and the service tunnel is just on the other side. The right wall has the earthen embankment on the opposite side.
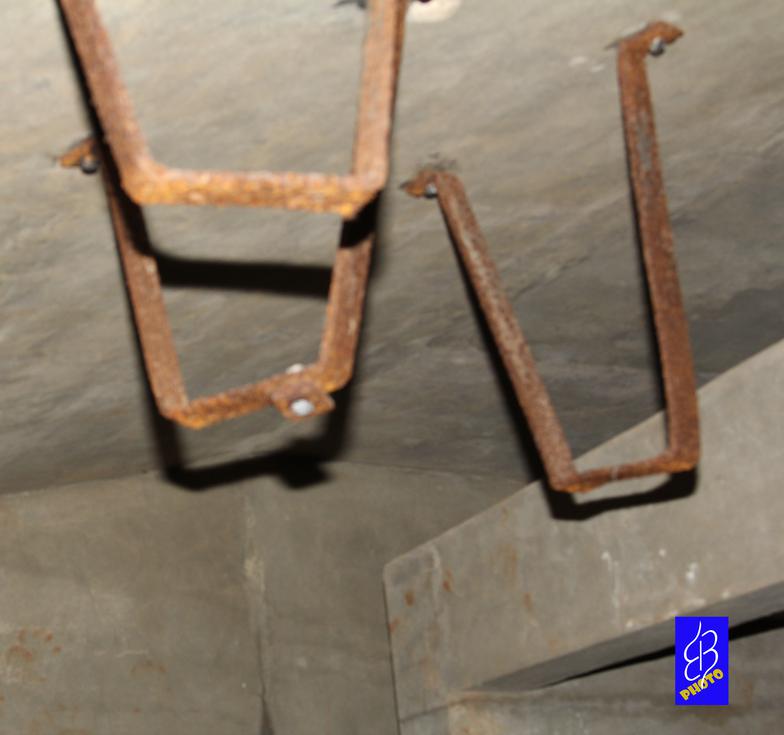
Here are two pictures of the service hallway that leads to the ammunition storage. This is the north end hallway of Battery Hall. The magazine areas for powder and shells are to the right. There are two powder rooms and two shell rooms for each gun. This area supports gun number 2 and there is an equivalent area adjacent that supports gun number 1 at the other end. In the ceiling you can see remnants of the overhead trolly system that was used to transport shells in the interior. (Insets) The shell was placed on a shell cart for transport to the outside gun.
As a note, it was difficult photographing the interior portions of the fort since most of the areas were "pitch" black. A flashlight had to be used to focus and many times a flash wasn't enough to erase the darkness.
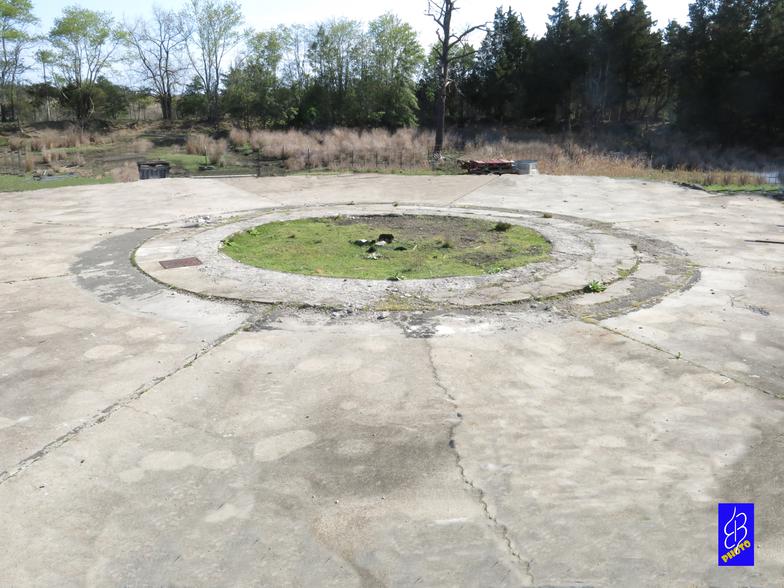

Here are two pictures of the gun pad location for Battery Hall number 2 gun. The concrete pad measures 100 feet in diameter. The below grade opening for the Barbette Carriage measures 23 feet 4 inches across. The recessed opening has now been filled in with dirt and shows in the picture as the grassy circle. The gun mounting anchor bolts were in the floor at the bottom of this recess. The concrete slightly elevated rim around the opening is 5 feet 10 inches wide and surrounded the rotating deck of the carriage.
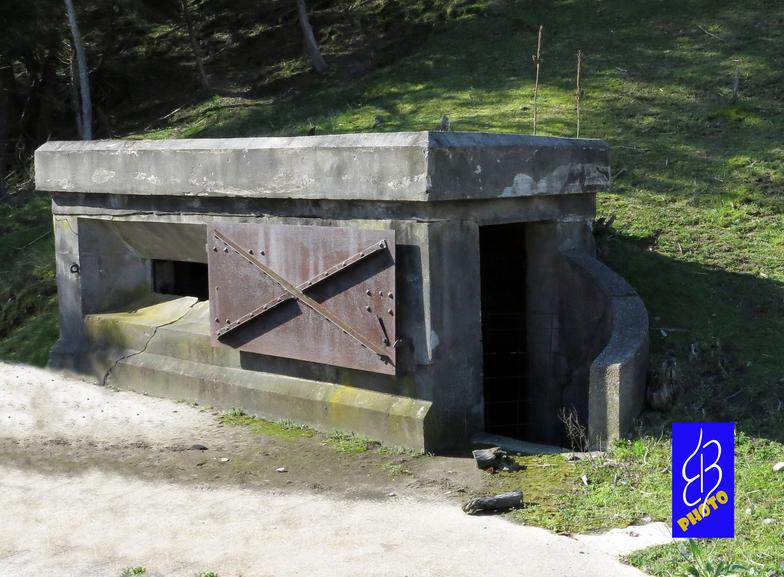
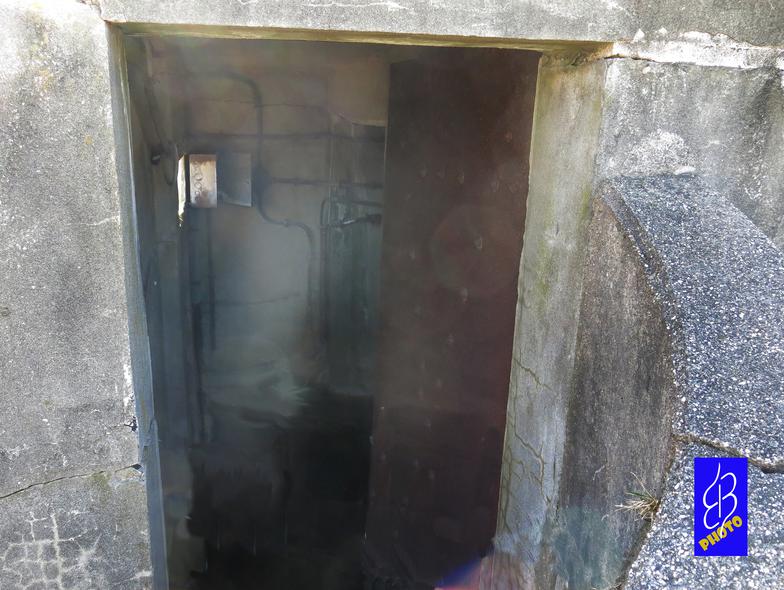
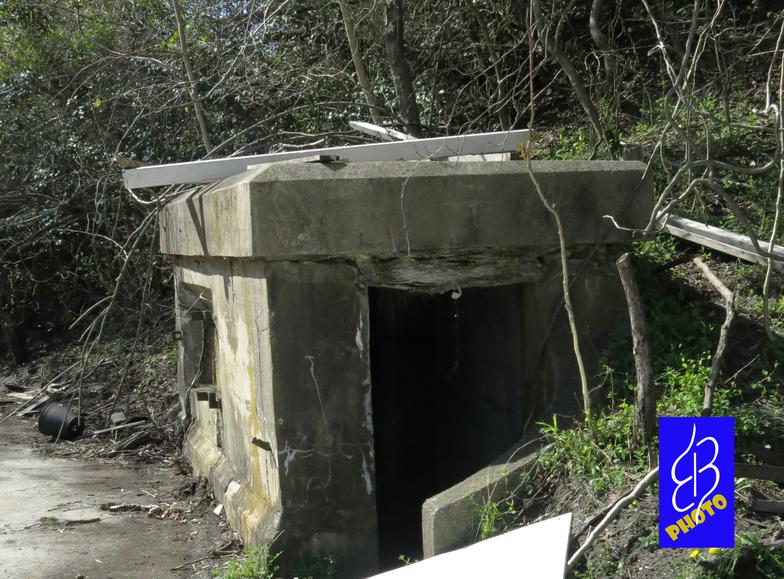
This concrete bunker is connected to the interior of the fort by a tunnel allowing access to gun pad. Center picture is looking into the bunker with personnel door open. This is the entrance of the M. 1. or M. I. tunnel as mentioned below. There are steps that lead down to the floor level of tunnel. The swinging steel door on front can be closed to cover viewing port. Interior tunnel pictures are shown below.
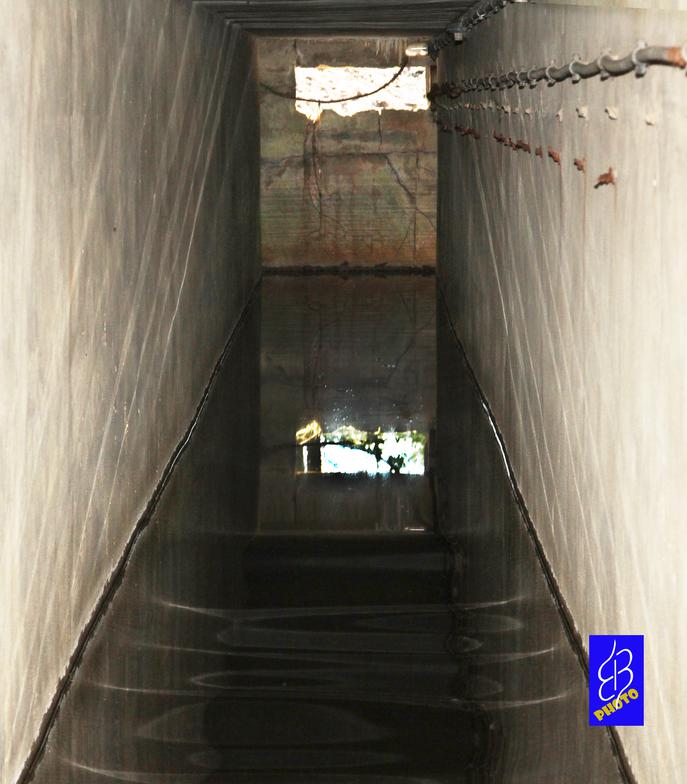
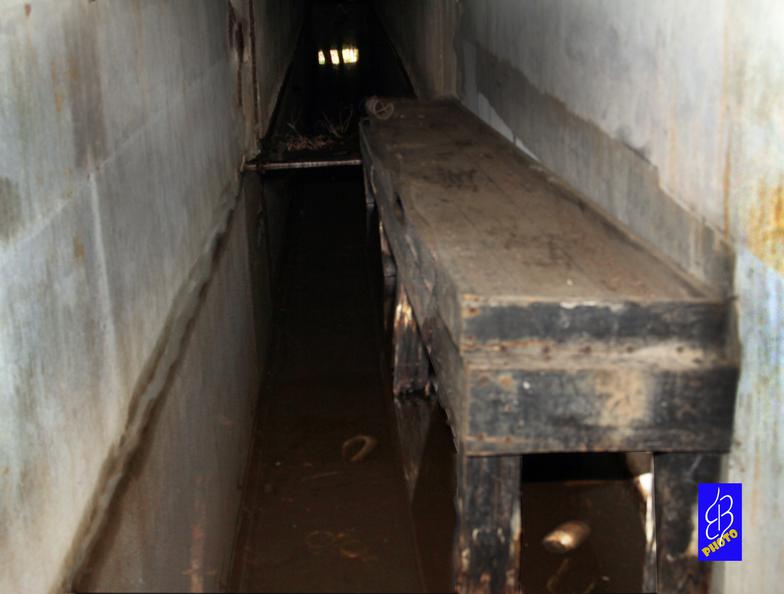
These two pictures show two of the tunnels that connect the interior of the fort to outside bunkers for personnel access. The tunnels currently have about 4" - 6" of water standing in them. On the floor plan, these tunnels are labeled either M. 1. or M. I. Tunnels. More research is needed to find out more about these tunnels. The light is entering through the viewing ports as pictured in the above pictures of the bunkers.
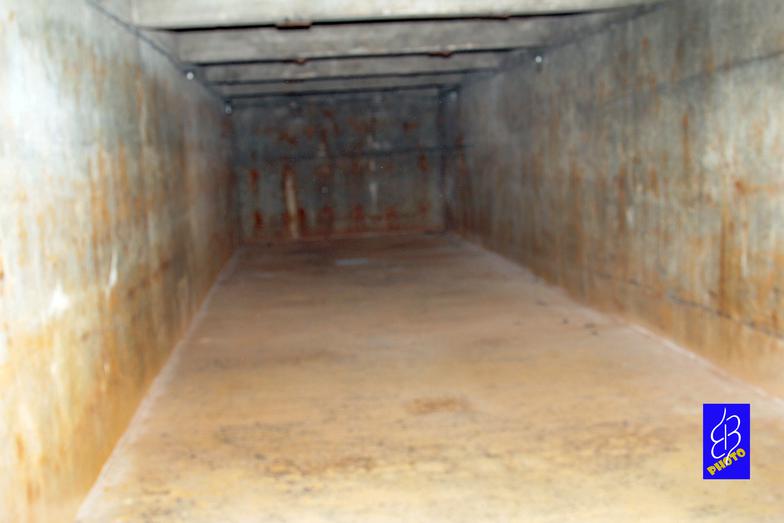
Here are two pictures of inside the magazine storage area rooms for shells. The fort has 8 of these rooms with each battery having 4, or two for each gun. There are also 2 powder storage rooms for each gun adjacent. The powder rooms look the same, but did not have the trolley system. The shell rooms had an overhead trolley system to transport the more than 1000 pound shells. Some of the remaining mounting brackets are still attached to the ceiling. The trolley system was used to move the shells both to the shell cart for the guns and to off load supply deliveries. The walls that separate the shell and powder rooms are 3 feet thick concrete.
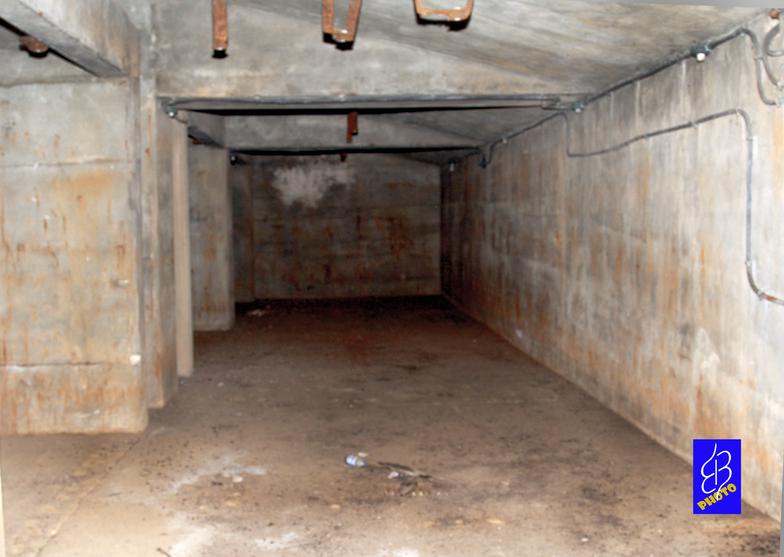
This is a picture of the magazine service hallway. The shell rooms and the powder rooms are to the left. The closest two rooms are for shell storage and the last two are for powder storage. This location serves gun number one for the battery. Again you can see the trolley mounting brackets still attached to the ceiling. In the picture above, the positioning of the brackets indicates a turn in the trolly path to go to the main service corridor.

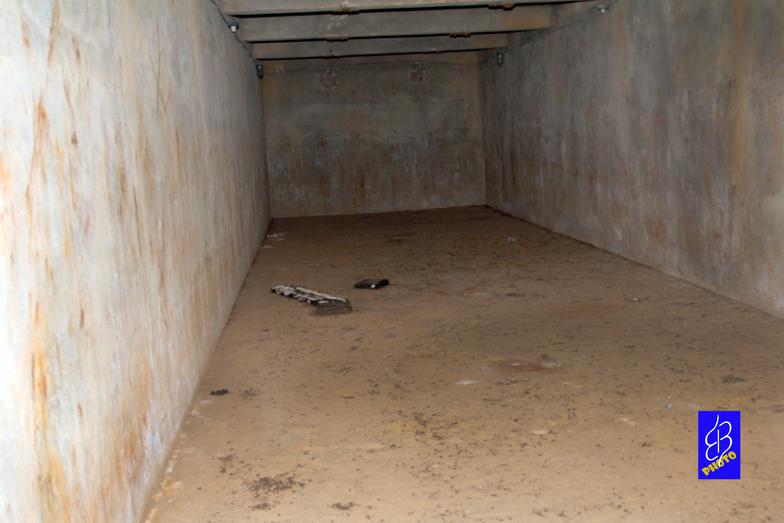
This picture was taken looking out toward magazine service hallway from the back of a powder storage room serving gun number 1 for Battery Haslet. It is the last room in the row of four (two shell and two powder). The main corridor is to the right as you exit the powder room. The powder and shell storage rooms are simply open rectangular concrete rooms.
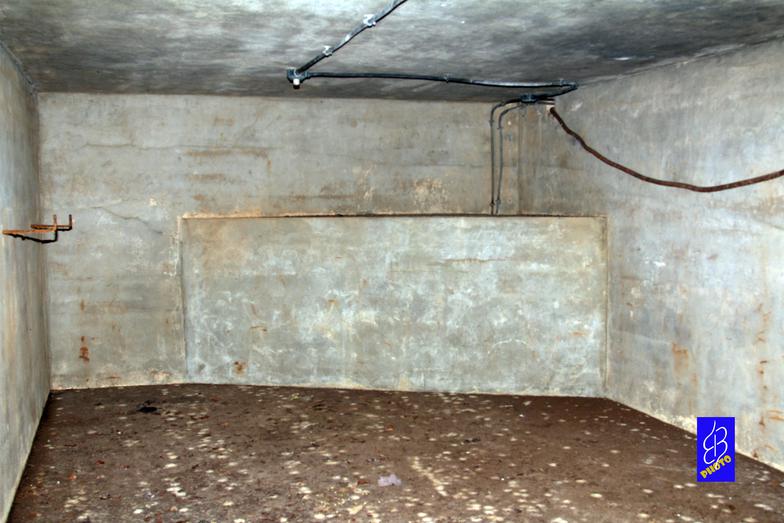
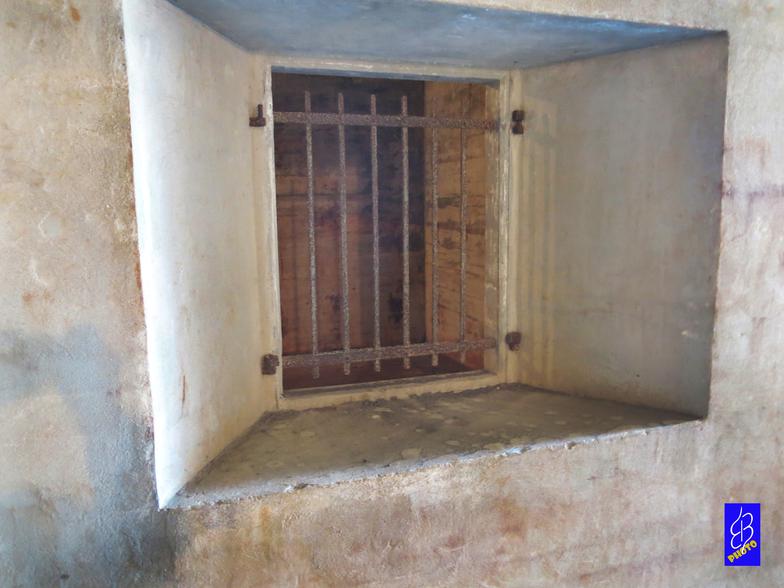
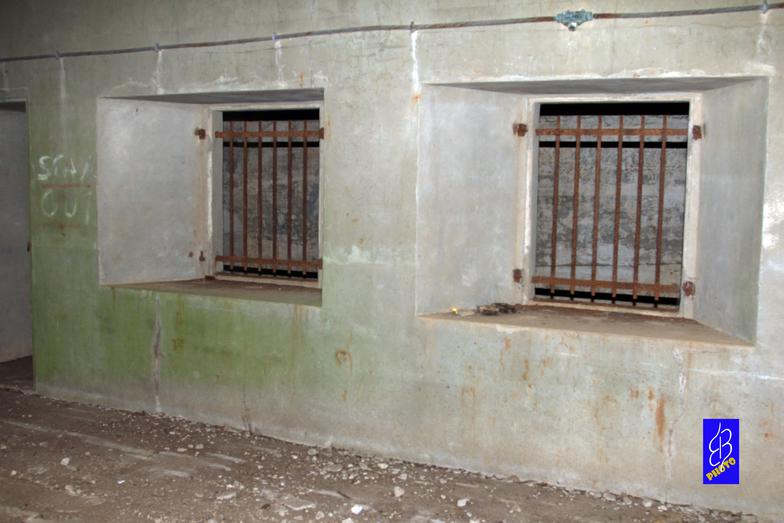
I believe this is a picture of the plotting room. I might add that everything was so dark, it was hard to see what was in the pictures until later. The main service corridor is just outside the room as can be seen through the window. The windows that can be seen are for the troop quarters across the corridor. The entrance door for the room is just to the left of the window.
This picture is of the area behind the plotting room. The angled part in this room is believed to be the wall for the M.I. tunnel that goes out to the viewing bunker at the gun pad. The entrance to the tunnel would be on the other side of the right wall and the tunnel would go to gun 2.
This picture is looking into the doorway and down the steps into the bunker. The viewing opening to gun is to the left and the tunnel to the fort is to the right. As noted above, the tunnels had 4-6 inches of water in them.
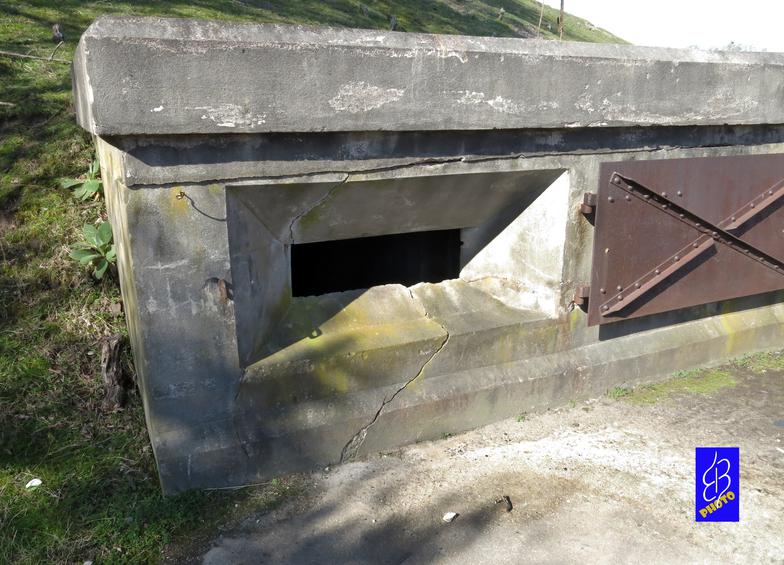
This is the bunker for gun #1 at Battery Haslet. As mentioned, the condition in general of Battery Haslet is much worse than Battery Hall as evidenced in this picture. Notice the concrete deterioration at the top of the door opening. The guns from Battery Haslet were removed and relocated to Fort Miles Battery 519 in 1942.
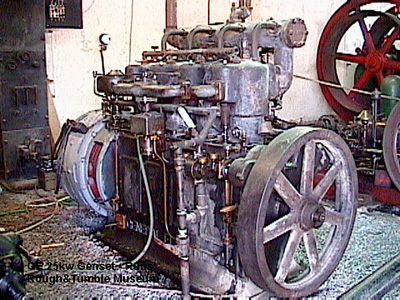
In the center of each of the main bunkers, between the magazine areas, there was a mechanical room that housed generators and radiators. The pictures above are two views in the generator room, one from each battery. (Haslet on left, Hall on right) Before commercial electrical service was available at the fort, electricity was supplied by two 25 KW generators for each battery. (The generators assumed the role of emergency back-up after commercial electric was provided.) In the picture to the right, you can see the mounting bolts for the two generator pads. In the picture to the left, a view looking in the opposite directions shows only one of the two mounting platforms. At the far left, you can see the mounting pads for the radiators in the next room. You might note that each generator had a "pipe trench" or gutter next to it. This allowed conduits connecting to the radiator room to be installed below floor lever without having to step over them and still have access to the conduits. In the picture on the right, the back wall is 2 feet thick concrete and the wall on the left is 3 feet thick concrete.
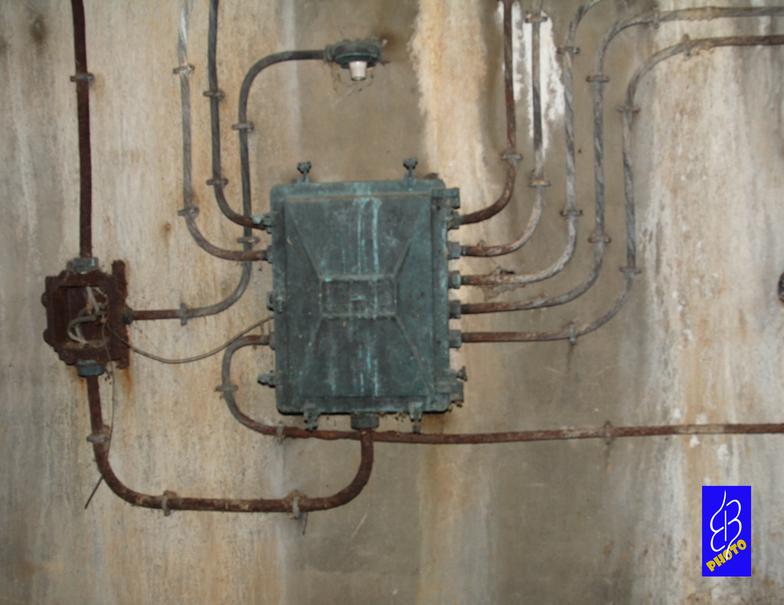
The above pictures are examples of electrical distribution and fuse boxes. The picture on the left is the electrical panel in the Battery Hall troop quarters. The bluish area through the window is actually the main corridor and you can see the rail tracks on the left through the doorway. The picture on the right is a panel in Battery Haslet. These two pictures are very indicative of the relative conditions of the two batteries in general with Battery Haslet showing much more deteriation.

At left, is another picture of the mechanical room. The pipe gutter leads into the radiator room. The picture below is a 25KW generator of the type that would have been installed in the generator room to provide electricity to the fort.
This is a picture of the radiator room that housed two radiators, one for each generator. The pipe gutter is seen along the base of one of the pads. Notice the two wall openings where warm air is exhausted. On the opposite side of the 1 foot concrete wall is an air passage to magazine areas. The wall on the left is a 2 foot concrete wall with the magazine area behind that wall.
The system was designed so that warm air from the radiators could be used to heat the troop quarters or the magazine area or exhausted into the main corridor during warm weather.
An interesting detail is that two generators in Battery Hall had the serial numbers or inventory numbers of 14368 and 17740. The two radiators were numbered 14762 and 17247.
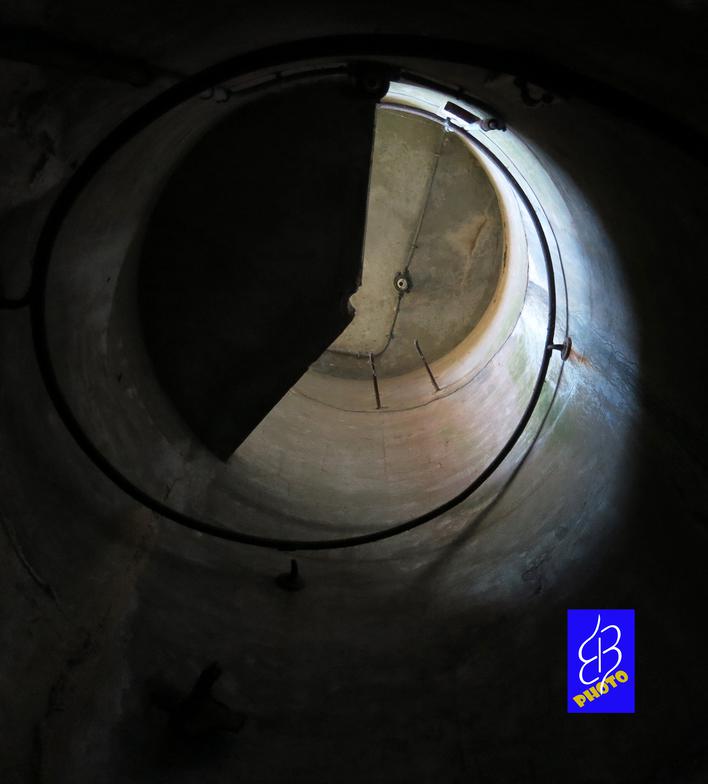
I added this picture as a bonus mainly for the photographic interest. It is a picture of the circular staircase cylinder looking up from the ground floor. The door to the BC is open allowing the illumination of the upper portion and silhouetting the landing that remains. While the steel steps have long been removed, this picture shows the handrail still in place.
As a personal note, this project has been a challenge in that the two primary objectives were to document not only the physical attributes of the fort, but also to show the current condition of the fort after almost 100 years. I thought this picture was a little more interesting than a regular "record" picture. My hope is that you enjoy the results of the project.