
Fort Saulsbury, DE

Delaware's Forgotten Fort
This page explains a little about the Fire Control Towers and how they were used for target acquisition. Fire Control refers to the methods used to control the firing of the big guns and is not to be confused with a similiar type tower used to watch for forest fires. The towers could be considered the "eyes" of the fort, as they housed the observers.
The entire process for firing the big guns was quite a science. Beginning with the target acquisition, the target had to be confirmed for identity "Friend or Foe," tracked for movement and location plotted. This information was then used with other variables to calculate a firing solution to provide to the gun crews with an azimuth and elevation determination. Only after all of these steps are completed, can the command to "Fire" be given.
Some of the variables that have to be considered by the cannoneers are: (1) The observer's elevated view of target, (2) Visibility over the horizon, (3) Barometric Pressure, (4) Temperature of gun powder (5) Range of target vs range of guns, (6) Surface winds and winds aloft, (7) Projectile time in flight or time to target, (8) Firing rate of gun, (9) Reduced visibility and night operations and (10) moving targets with zig-zag courses.
When the fort was built, two observation positions (Identified as BC on plan drawings or Battery Command Stations) were incorporated in the design of each battery for the purpose of Fire Control (FC). The concrete positions were located on top of the bunkers at each end of the mounds. There was a connecting personnel channel for access. Each position had an azimuth finder for target aquisition. These observation positions were limited because of relatively low elevations and basically a singular field of view. The observation positions and the connecting channel are visible in the aerial picture of Battery Hall below and marked by the yellow circles.

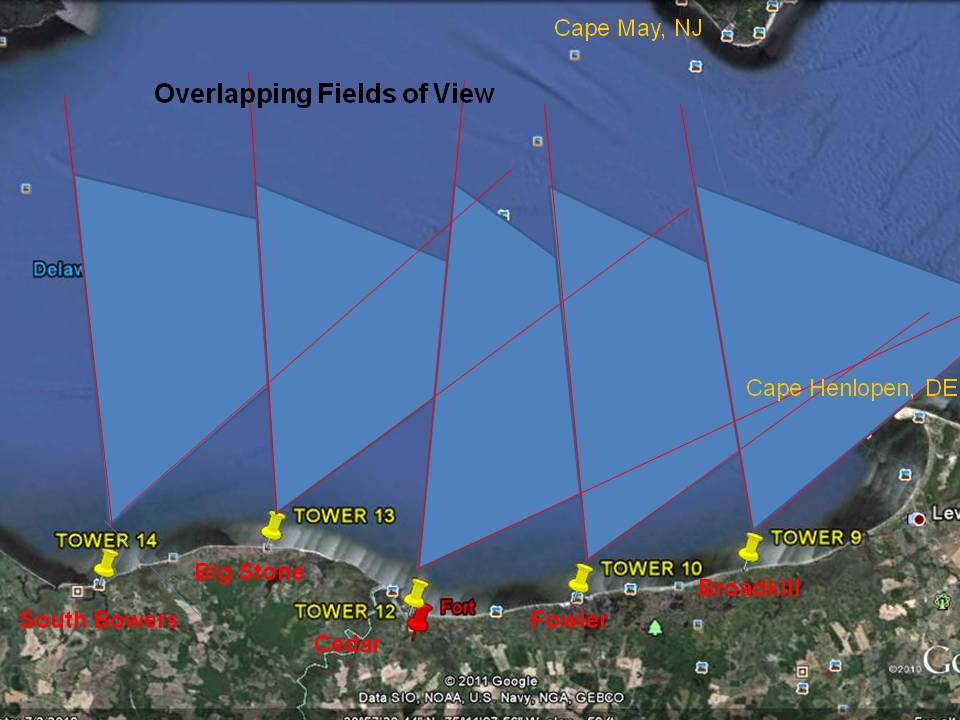
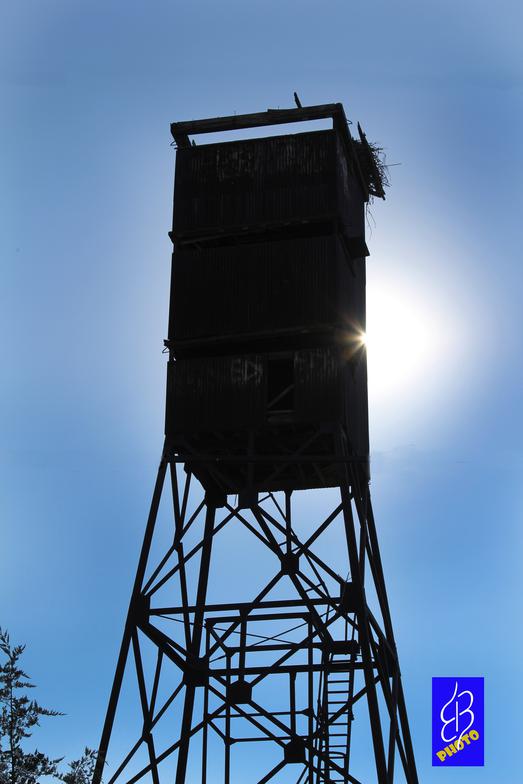
As preparations began for the possibility of another war, Fort Saulsbury had several new modifications added. One major upgrade was the Fire Control System capabilities with the construction of five observation towers in Delaware. While these towers are not to be confused with the concrete Fire Control towers for Fort Miles that most everyone has seen, they served the same purpose of target acquisition and relaying the information to fire the guns at the enemy.
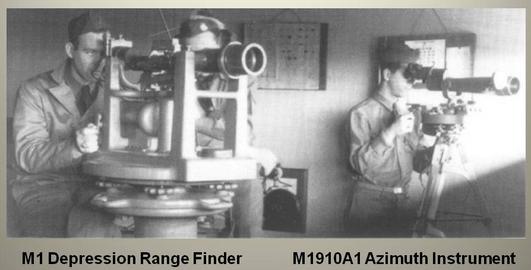
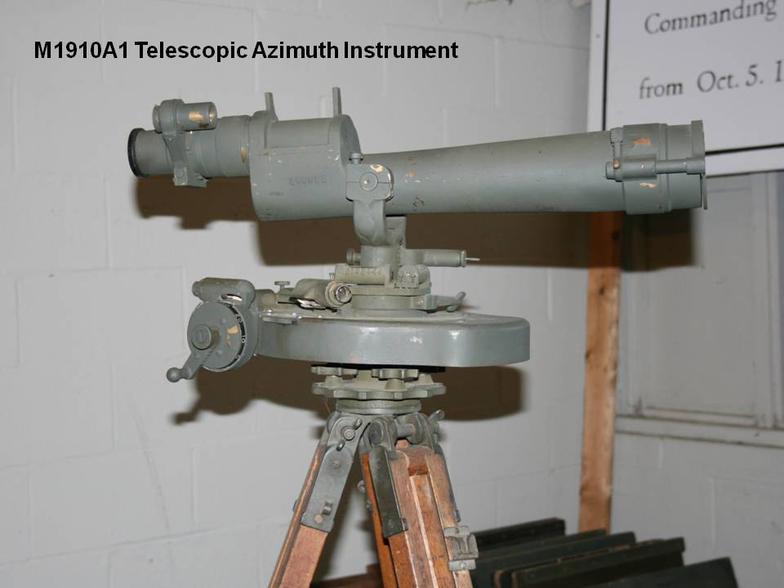
The five FC towers were located from north to south in South Bowers Beach, Big Stone Beach, Cedar Beach (closest tower to fort), Fowler's Beach and Broadkill Beach. Each tower had at least two decks with some having three decks. Each deck had specific equipment and was assigned to one of the gun batteries at the fort. The two main pieces of telescopic equipment used were the M1 Depression Range Finder (distance) and the M1910A1 Azimuth Instrument (direction). The observers then relayed the readings to the command post at the fort which was basically the plotting room.
Plotting table at Fort Saulsbury
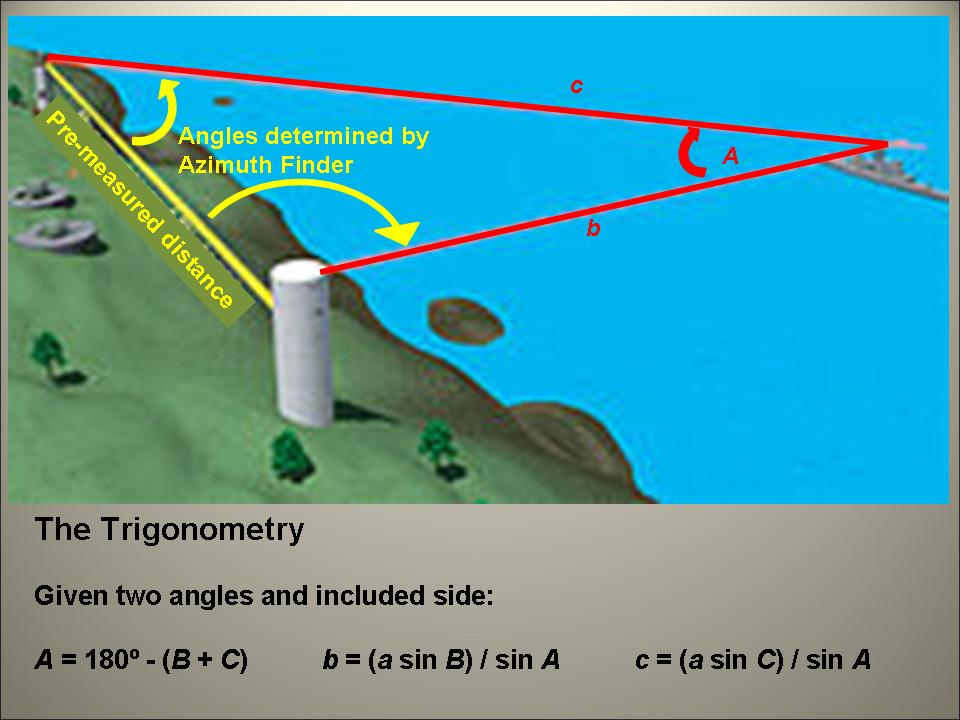
Triangulation is the process used to determine the unknown position of target by using known values. Values indicated by the yellow are known and the red values are calculated.
Plotting and calculation process to determine location of target and projectile intercept.
Remaining artifacts of FC Towers supporting Fort Saulisbury
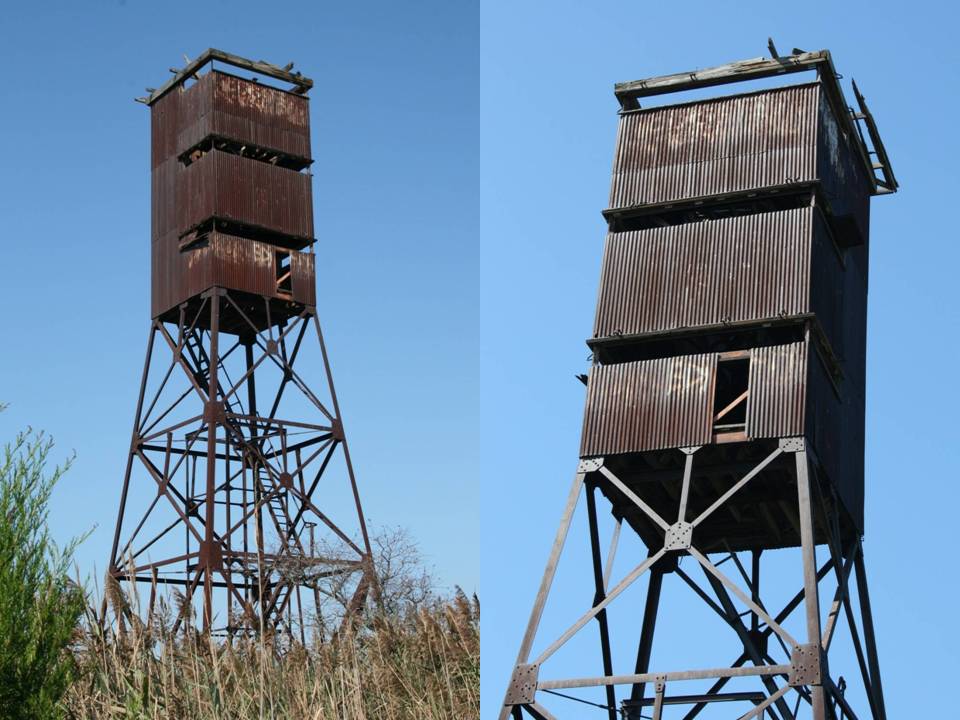
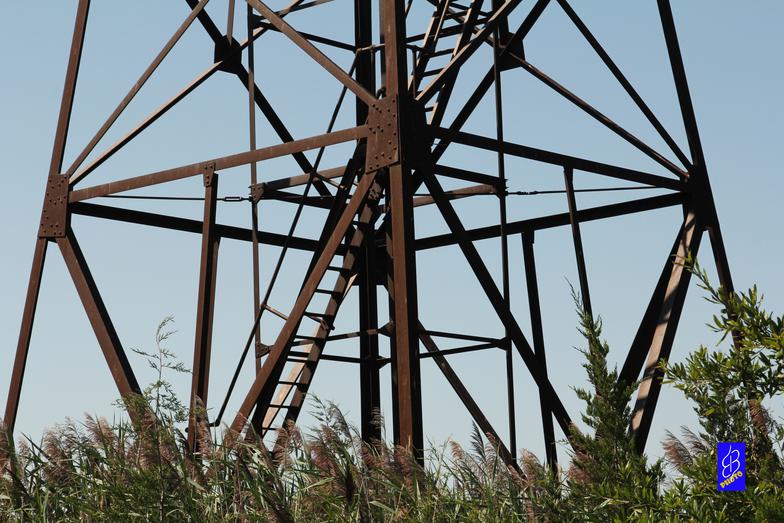
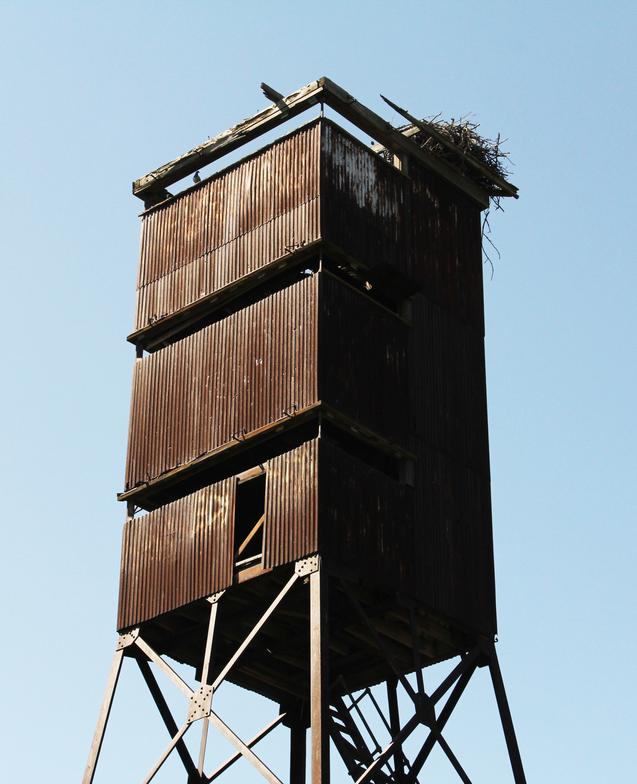
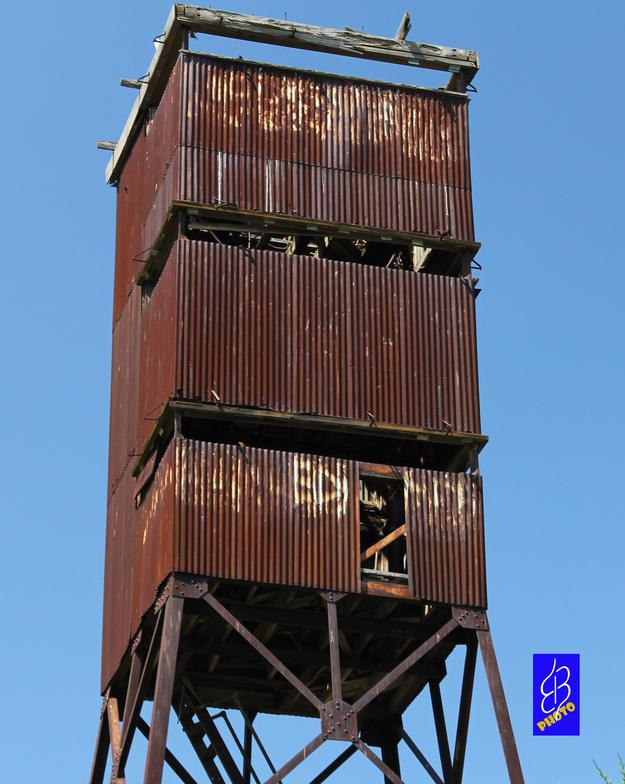
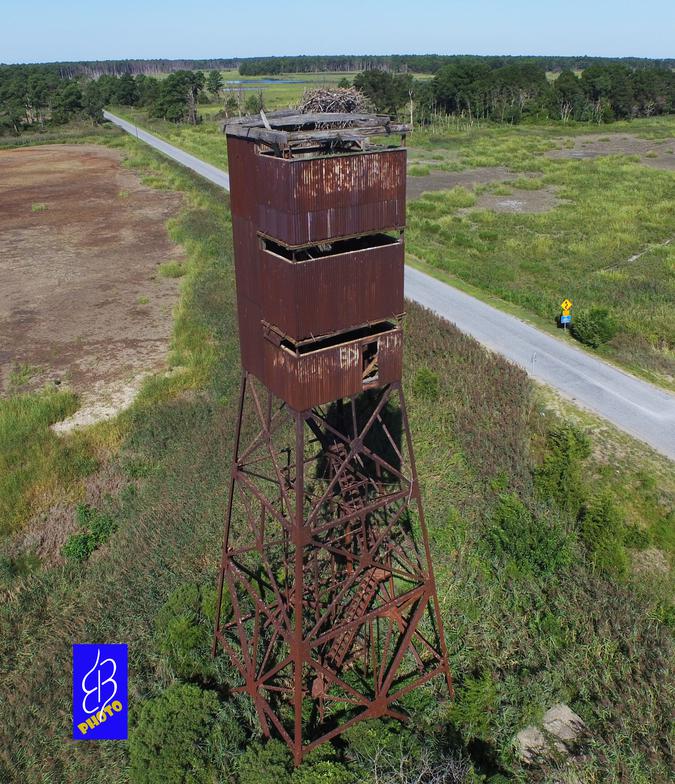
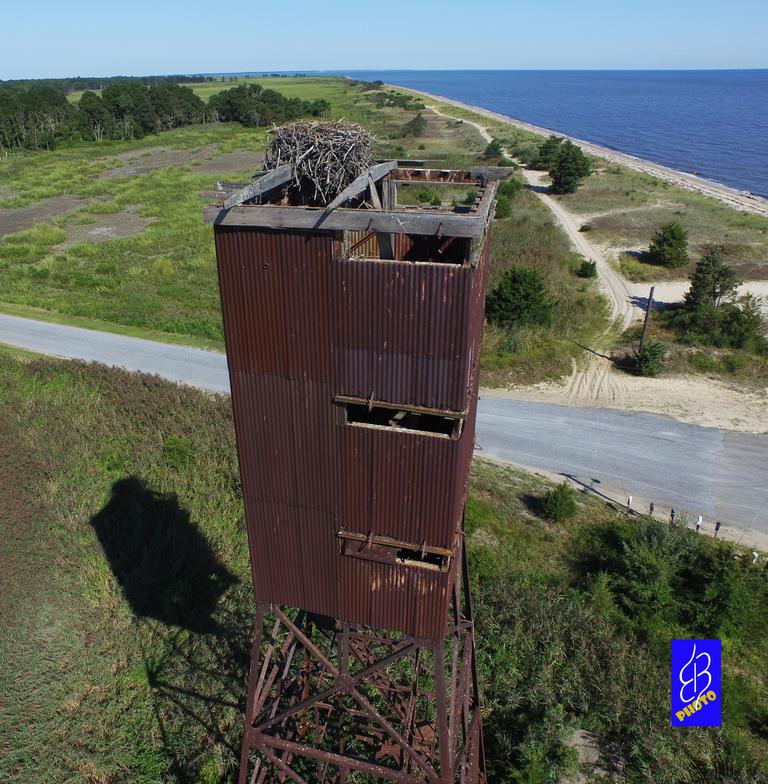
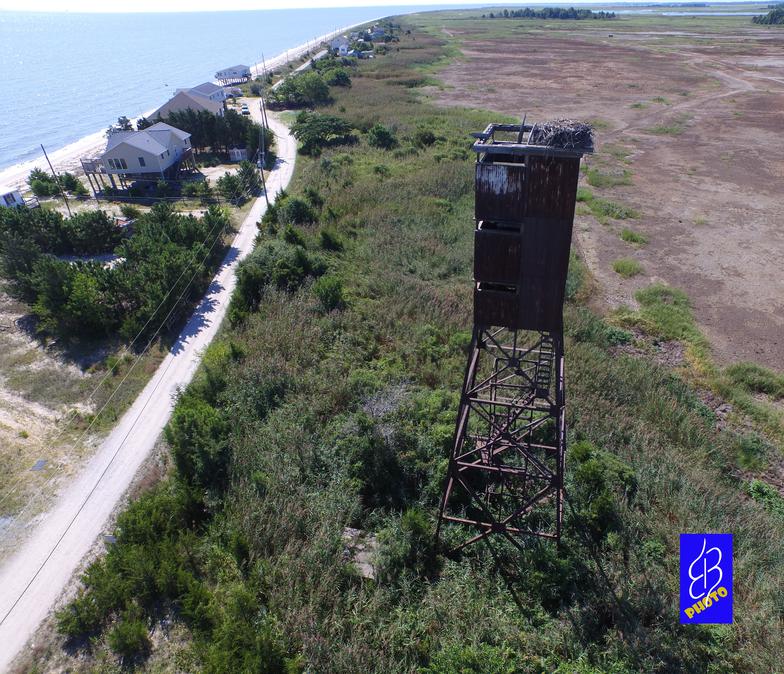
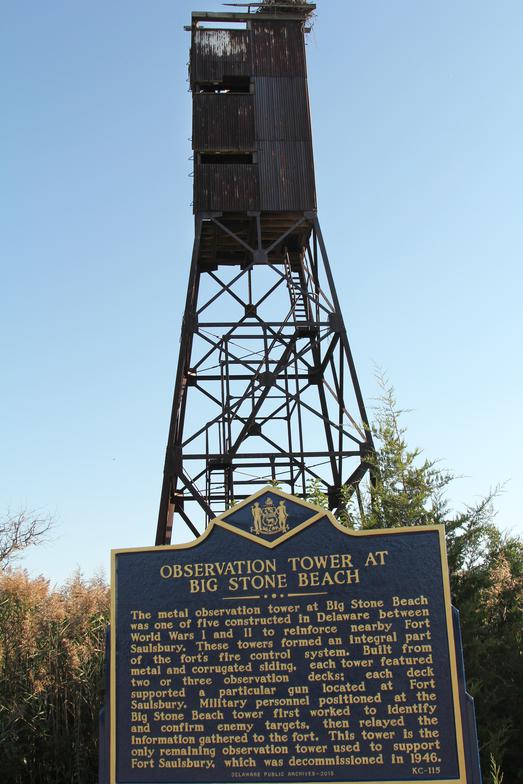
The only remaining FC Tower for Fort Saulsbury that still stands is located at Big Stone Beach as pictured here. The towers were all of the same design with the metal structures and corrugated siding. While definitely showing its age, it is somewhat of a marvel that it still stands given all of the storms etc. over the last 70 years.
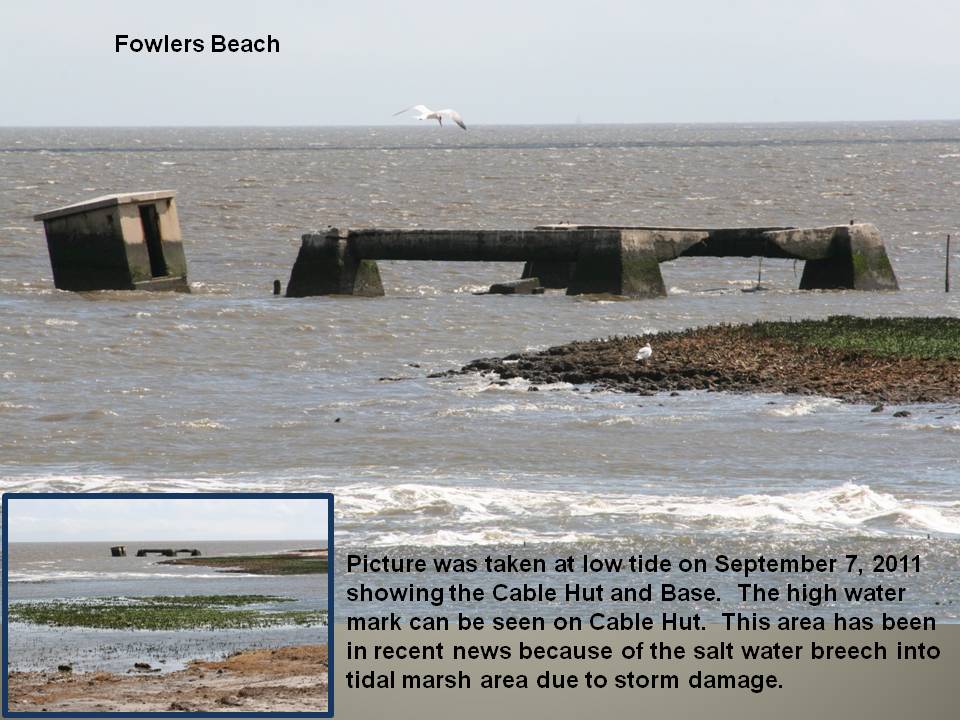
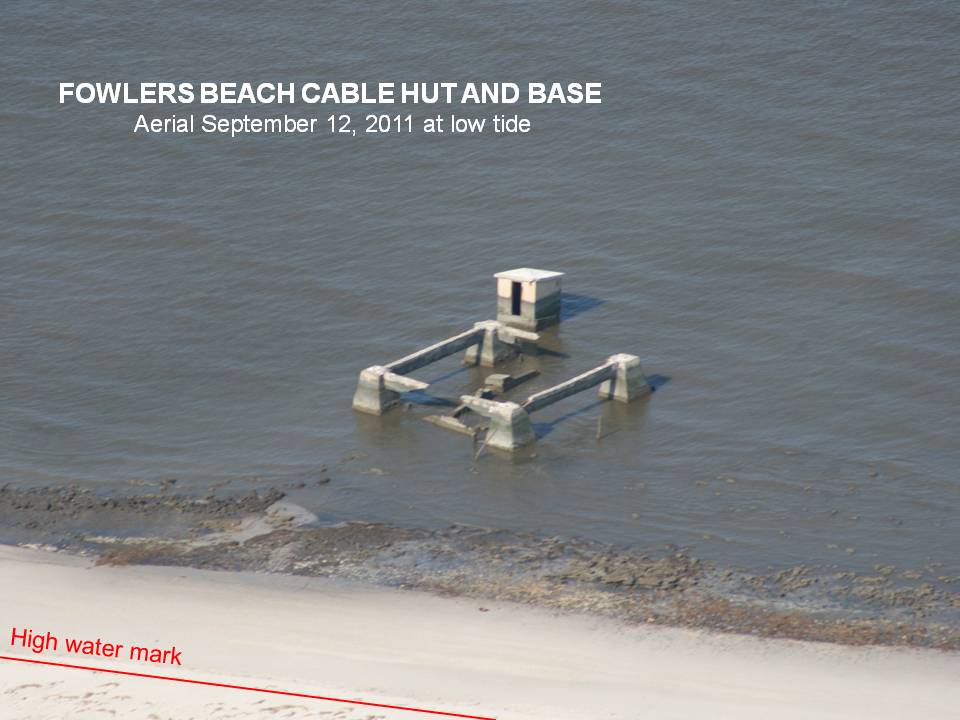
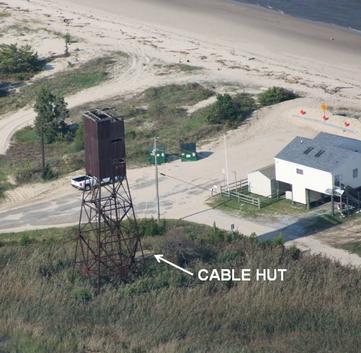
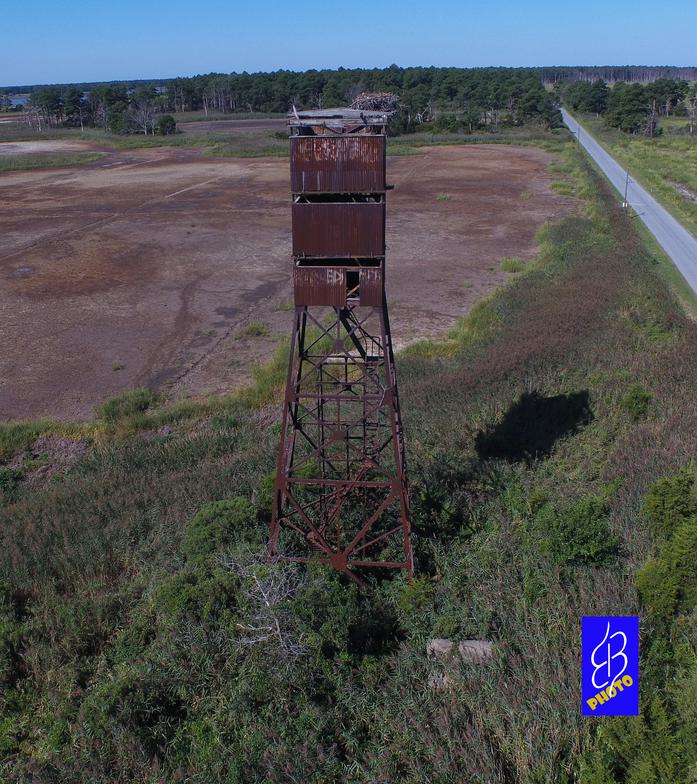
The second remaining tower item is the tower base and cable hut at Fowler's Beach. Although the tower was built 200 feet from the low water line, 70 plus years of erosion has caused the beach front to advance past the tower base, which now sits completely in the water. The cable hut was used as a junction box for the connection of the communication cables linking the towers and command post.
The tower located at Fowler Beach was Tower # 10. The construction and dimensions of the tower were identical to Tower 13 pictured above. There were also four Azimuth Telescopes used in tower 10 or two for each gun battery. However, it is reported that the top tier was tied to Battery Haslet and the mid tier tied to Battery Hall for tower 10.
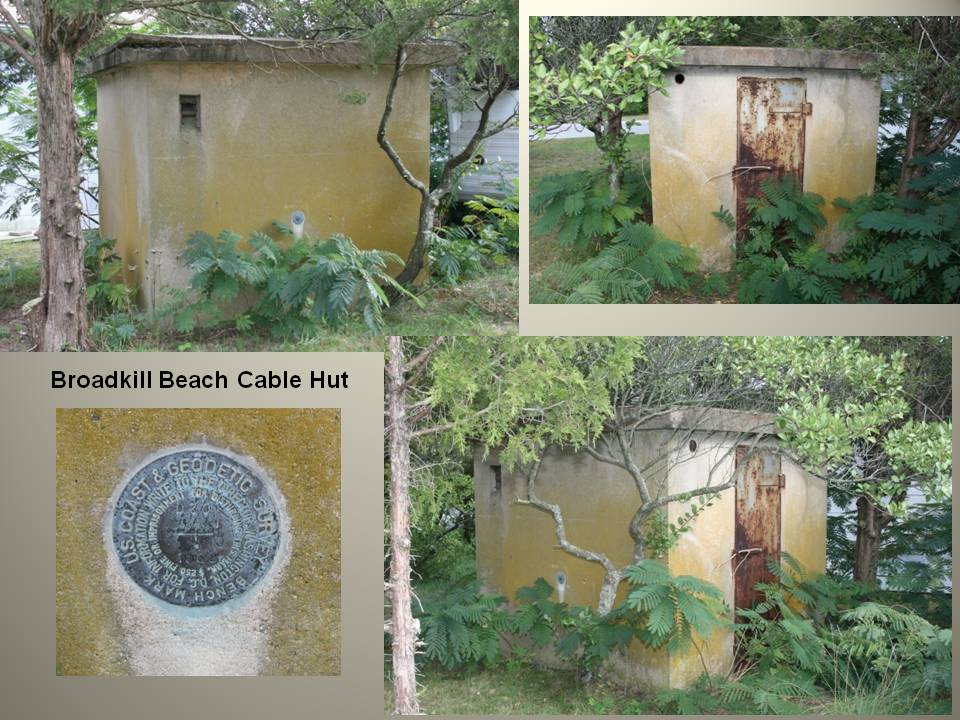
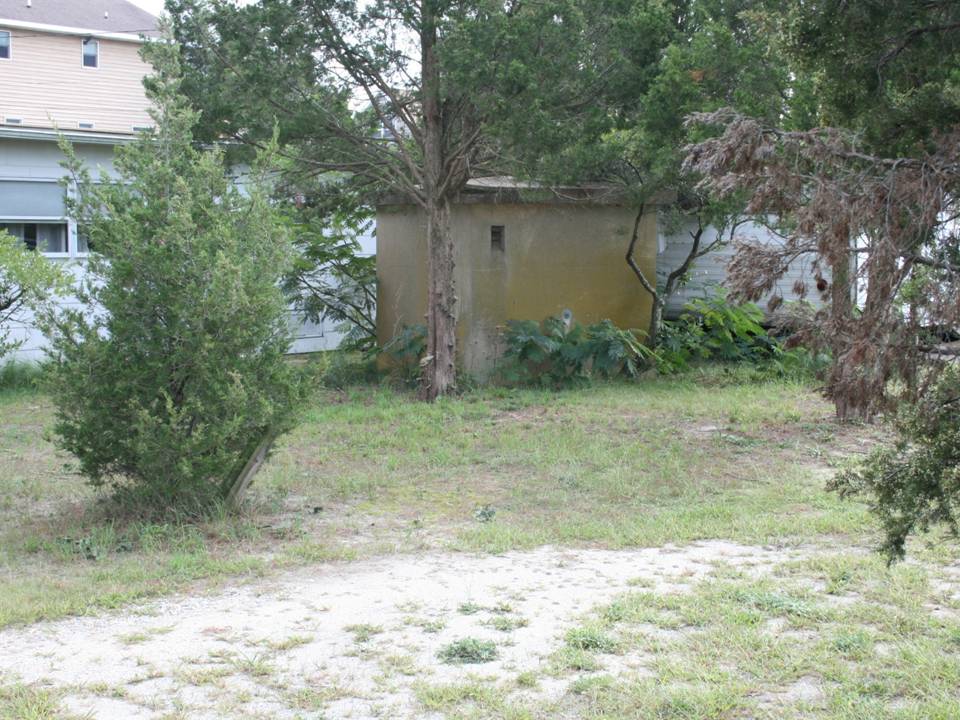
The last remaining item from the five towers is the cable hut at Broadkill Beach. The cable hut sits just off the main street and is in amazing condition for its age. The steel door not only remains in place, it still works well. The associated tower was located across the street and there is no visible remaining indication of its existence. The interconnecting communication lines were lead covered cables of 26 paired lines. The cables ran from each cable hut out to the water and laid on the bottom of the bay to the next hut. The cable huts were used as a junction box for the cables. The three items shown are all that remain from the original five towers.
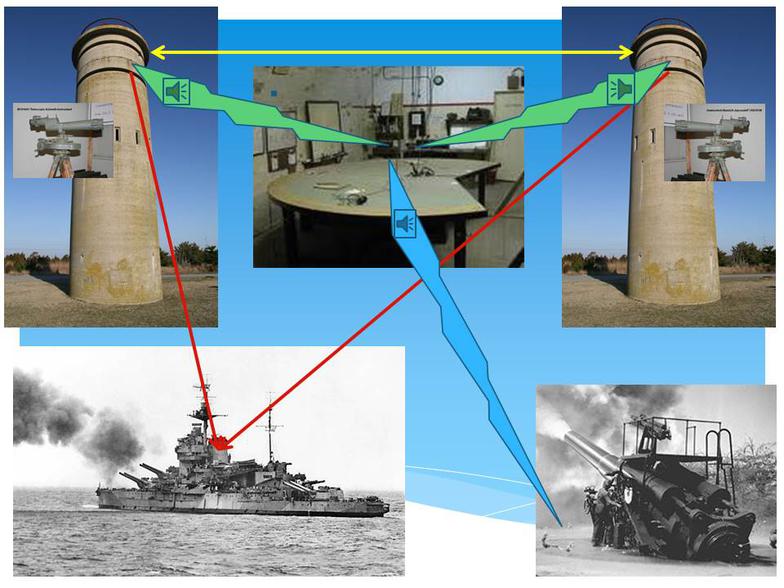
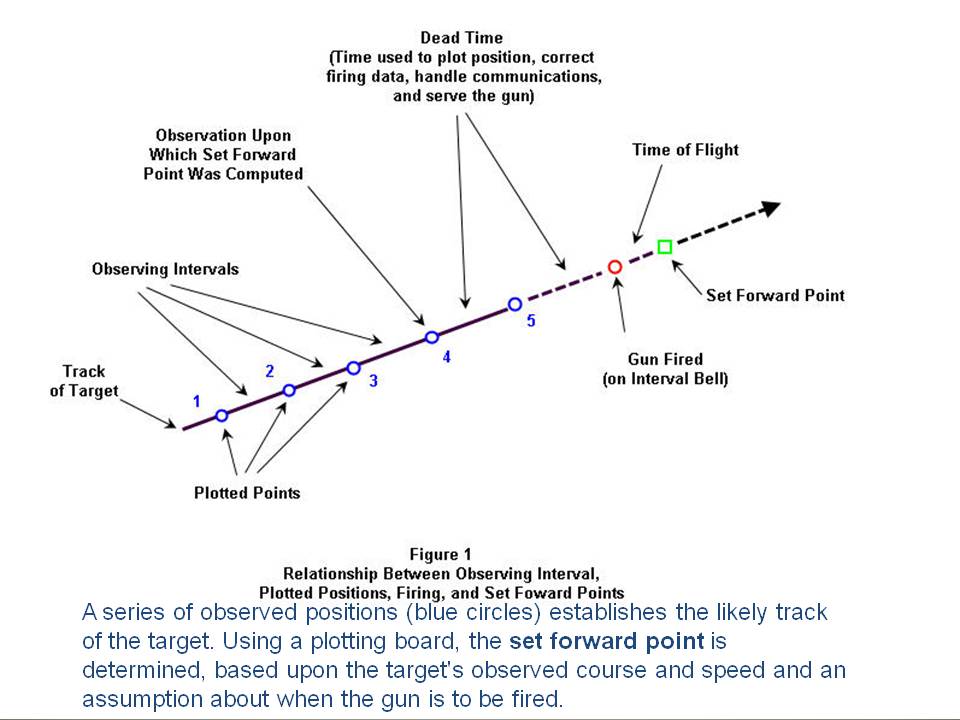
Using the diagram above, the relationship is depicted at left. The yellow line represents the measured distance between the towers. The two red lines represent the azimuths to the enemy ship from each tower. The communications between the towers and the plotting room is shown in green. The tower operator will report the azimuths as they track the ship. Once a position is tracked on the plotting table, directions will be communicated to the gun commander indicated in blue. The drawing below shows how the ship is tracked in this manner. The spacing between the red circle and the green square on the course line represents the distance traveled by the ship while the shell is in flight to the target.
Some updated pictures of the Big Stone Beach Tower taken 2015
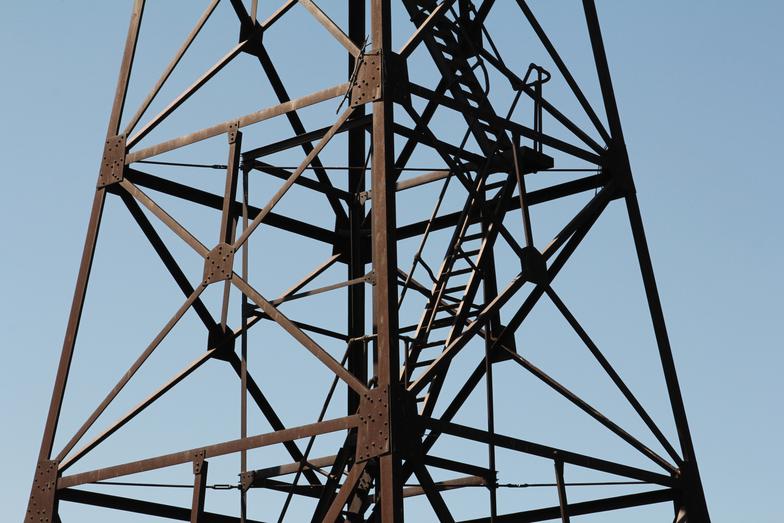
With a composite picture view, more of the tower details can be identified.
This tower was identified as Tower number 13. It was placed on a plot that was one half of an acre and located 350 ft. from the low water mark. There was a 10 foot right-of-way from the plot to the bay to allow for communication cables to be laid to connect with other towers and the fort.
The overall height of the tower is 70 feet.
The height of the supporting framework is 48 feet.
There were 4 sections in the framework or about 12 feet per section. In the composite picture, the lower section is totally obscured by the growth as well as the cable hut. The cable hut measures about 6 feet square and is 6 feet above grade. The top of the cable hut can barely be seen in the aerial picture above.
The observation section is about 11 feet square and is 22 feet to the top of the "A-frame" roof that is no longer there. Each floor of the viewing section was about 7 feet tall. Tower 13 had three viewing floors as can be seen with the 3 slotted openings. The lower deck viewing slot is about 53 feet above the ground. The middle deck viewing slot is about 61 feet above the ground and the top deck viewing slot is about 68 feet above the ground.
The steel steps accessed the bottom floor of the observation section with a 2 foot by 4 foot opening.
In this picture, it appears the steel supporting framework is in surprisingly good shape for being 75 years old. However, the same cannot be said for the wood parts. If you look closely in the middle viewing slot, you can see that the the ceiling (floor for the top section) is just about gone.
********************************************
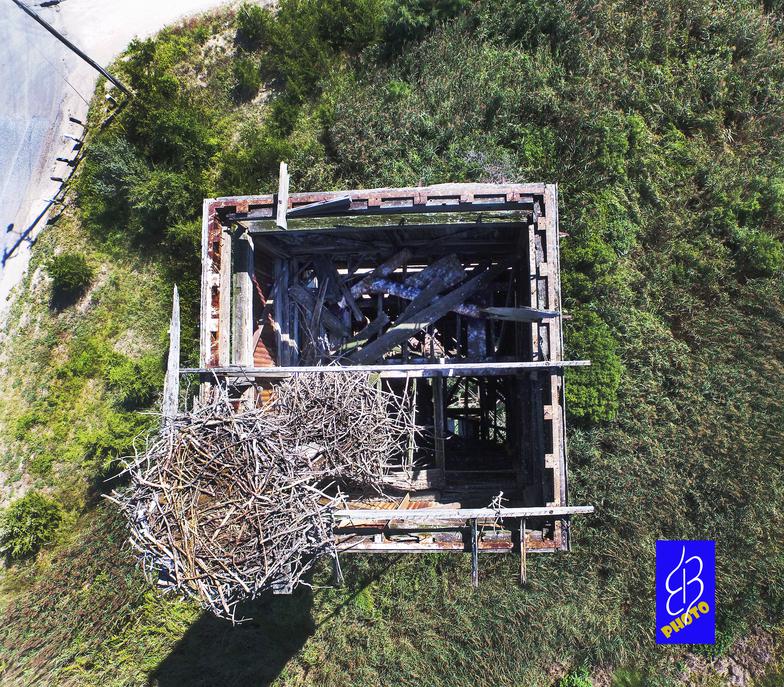
This unique camera shot was taken with a drone directly over the tower looking straight down. It is possibly the first and only view of what is inside. Sadly, the deterioration is substantial. When in use, there were three floors and a roof. In this view of the debris, there are places where you can see the ground below. That means that not only the roof is gone, but also three deck floors have rotted away. The floor joists can still be seen holding up the debris.
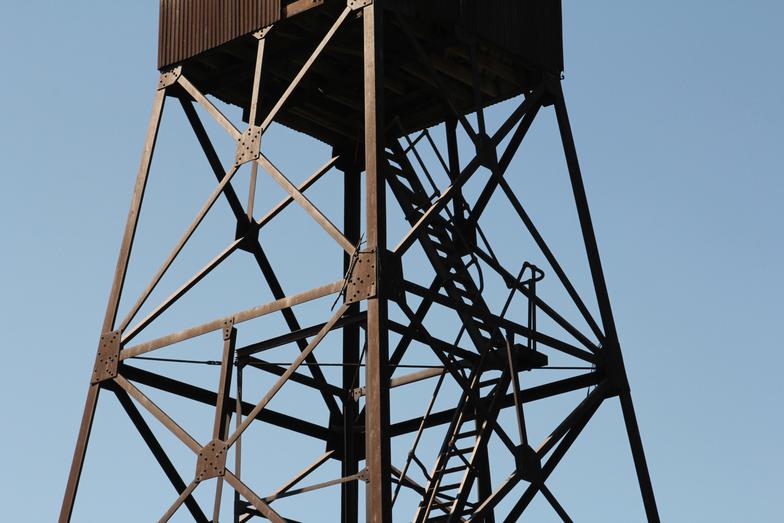
Here is a great view of the Big Stone Beach Tower. The top of the cable hut is visible in the lower right hand corner. The 6' tall cable hut is totally obscured from view at ground level.
Here is a close-up view of the top portion.
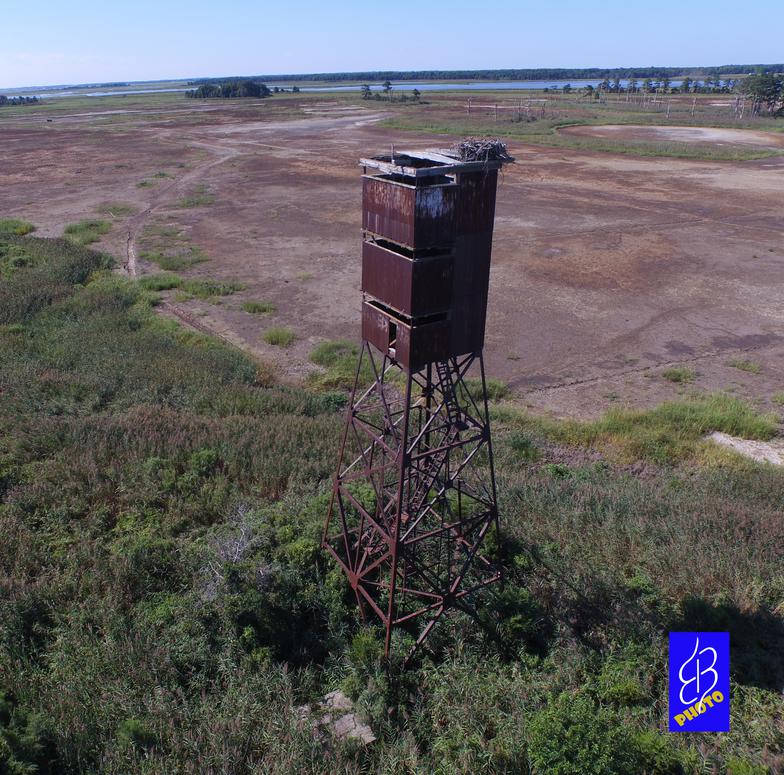
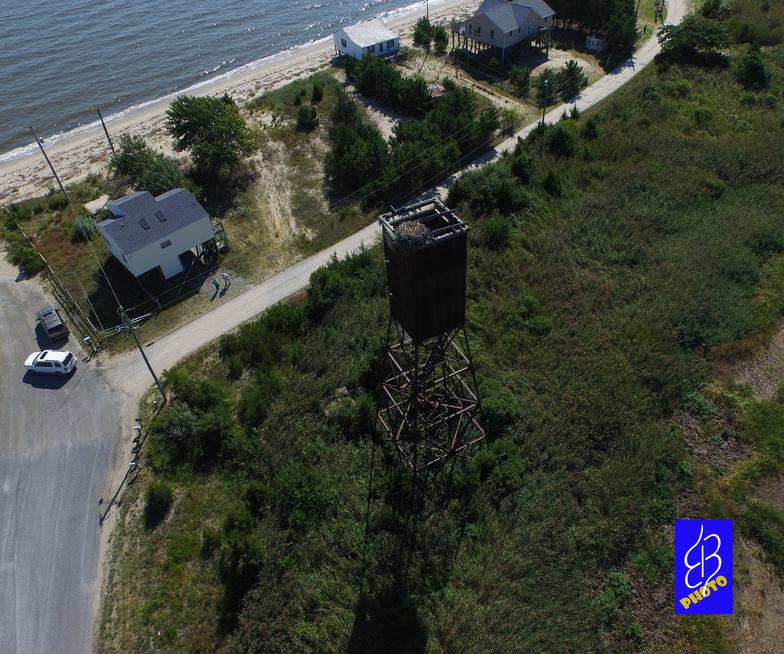
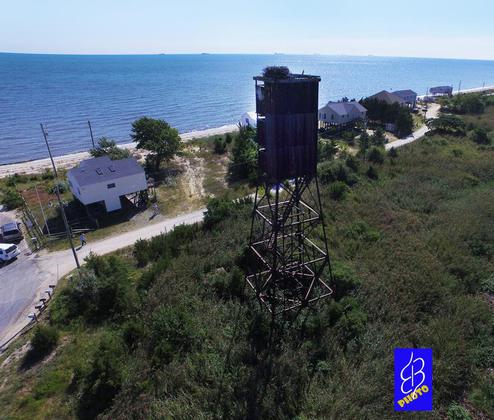
Here are four pictures from an elevated position that show the location of the tower at Big Stone Beach. The picture at bottom right is interesting because it shows the view of the bay with targets (ships) as the Army observers would have seen. There are 8 ships on the horizon in this picture at the "Anchorage" as shown in the enlarged view below. All ships were tracked and identified as "Friend" or "Foe." Also, the top of the cable hut is barely visible in all four pictures.
Research on equipment used at Tower 13 is not complete. The M1910A1 Telescopic Azimuth Instrument as pictured above was the most widely used instrument in the towers. It appears that there were two of these used on the top tier location that were supporting Battery Hall, perhaps one for each gun. Likewise, the lower tier also had two Azimuth Indicators that supported Battery Haslet again one for each gun. I have no information regarding the middle tier.
Two different targets could be tracked with azimuths being reported to plotting rooms at fort. When azimuth reports were also received from other towers, then the triangulation process could be used to calculate the location of the target.
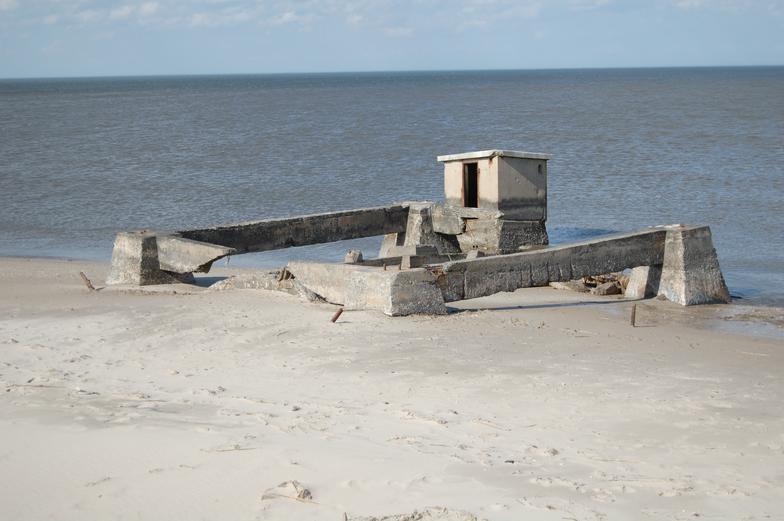
This is an undated picture of when the tower base was still on land. Originally, the tower was built 200 feet from the low water mark. Today, it is completely in the water.

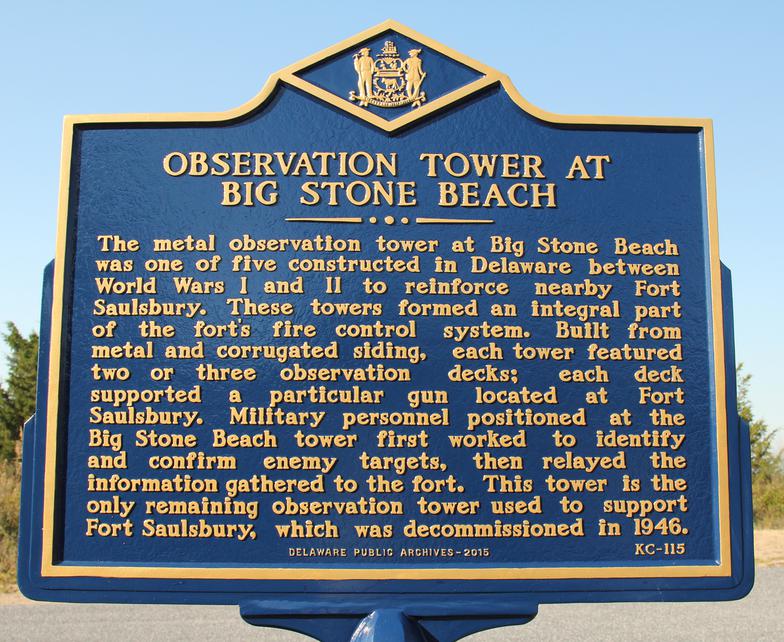
This historical marker was placed near the base of the tower on September 5th, 2015 to identify the important significance of the target acquisition and control purposes of the towers during WW2. Picture at left shows the new marker with tower in background.
Big Stone Beach Tower with late afternoon sun behind it.
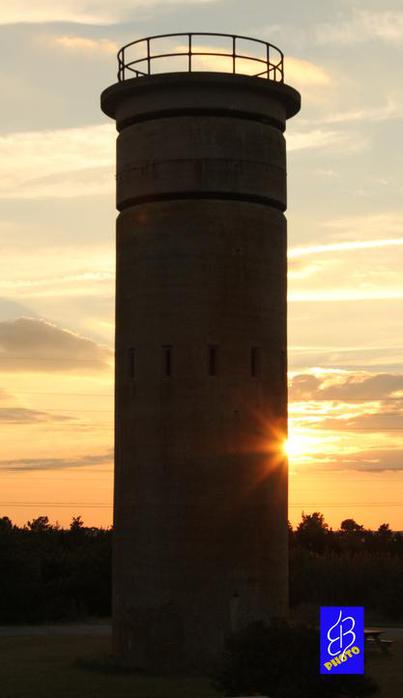
For general information, I think it is important to note that the corrugated steel towers used to support Fort Saulsbury, served the exact same purpose as the concrete towers that served Fort Miles. Most everyone that has visited the Delaware shore line has seen these towers as they are still standing today. The concrete towers had the same equipment with each deck being assigned to a different gun. The only difference is the construction materials; concrete verses steel.
Concrete tower number 3 that supported Fort Miles
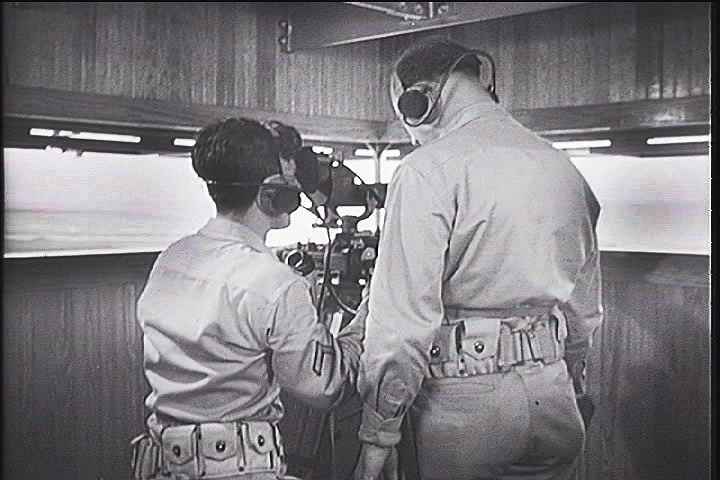
A rare photo has been found of the interior of one of the FC towers that supported Fort Saulsbury. It is believed that the picture was taken inside the tower located at Cedar Beach in 1942. There are several notable items in the picture. You can see the interior of the corrugated siding, especially in the upper right of the picture. You can also see some of the wooden framework of the structure. Although the picture is of poor quality, it shows a square structure as opposed to a round structure like the concrete version. At the top of the viewing area, the "window shutters" are visible in the open position along with the hinges at top. The M1910A1 Telescopic Azimuth Indicator Instrument on a tripod is shown being used. Communications with the plotting room and other towers are shown with the headsets and the chest microphones.
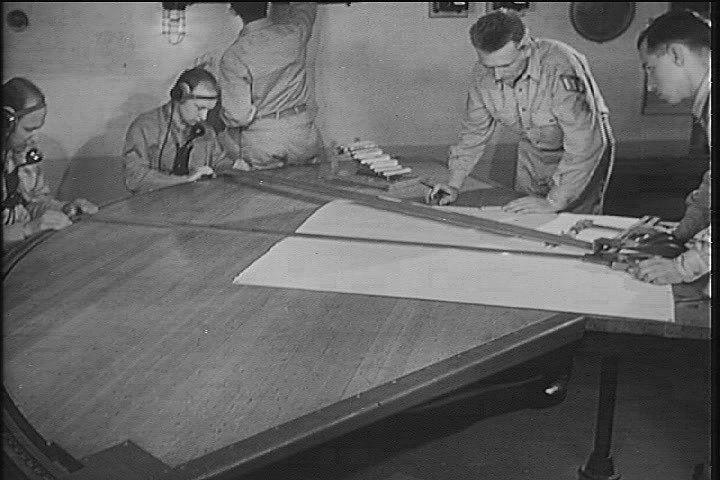
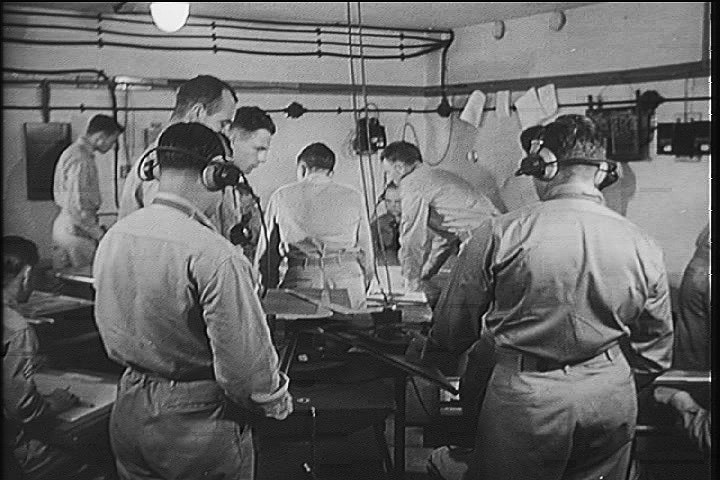
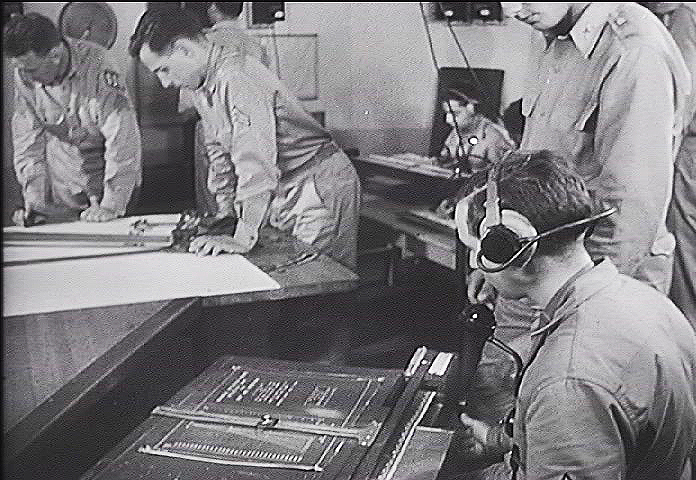
Here are two scenes in the plotting room at Fort Saulsbury. Position observation information is received from observers over the phone lines and the target position is identified using the plotting boards. The gun commander then receives the information for aiming the gun.
Note: With the beach replenishment and repairs to the breech at Fowler beach, the concrete base is no longer visible. I have not been able to determine if the base was covered over with sand or if it was removed. It will take more research to determine the status of the base.